As mentioned in the previous recipe entry for apple crumble, I attempted to shoot the process for another stop motion experiment. I think I did a better job than attempt #1, but I've still got lots to learn. I didn't really innovate too much in the process of editing - I nested some sequences to color correct those in groups, but I only applied the fast color correction effect and adjusted input and output levels. Other than that, it's basically as shot. I also can't seem to figure out how to import it in the best way to set it to be the right frames per second - no matter how I try to set the speed/duration so that it will give me 30 fps, I end up with too many seconds and not the right 1:1 ratio of picture per frame. But I'm sure I'll figure that out eventually (feel free to comment with directions or links if you know!).
Showing posts with label dessert. Show all posts
Showing posts with label dessert. Show all posts
Friday, March 21, 2014

Wednesday, February 12, 2014
Apple Crumble
I'll be honest, this was not my favorite recipe. After I made it, I read the comments (yes because I don't learn to do that first), and I noticed many people also found it too dry. Basically, probably not the way you want to go. But the apples turned out well, and when I first got it from the oven and ate it with greek yogurt, it was delicious. It has otherwise been nice to reheat and serve with greek yogurt for breakfast. I used my excess topping that I didn't put on the apples to make a granola pie thing by mixing in peanut butter and maple syrup. Take from all that what you will.


Filling
4 large Golden Delicious apples (about 3 pounds) [I used 4 or 5 smaller apples]
1/4 cup sugar
1 lemon, juiced [didn't have this, just sprinkled on some water]
2 tablespoons all-purpose flour
1/2 teaspoon ground cinnamon
Topping
1 cup walnuts or pecans, roughly chopped [didn't use this, but probably would be good]
1 cup all-purpose flour [too much! probably use 1/2 cup]
1 1/4 cups rolled oats [maybe start with 1 cup instead]
1/2 cup packed dark brown sugar
1 teaspoon ground cinnamon
Pinch fine salt
8 tablespoons (1 stick) cold butter, cut into small pieces
Vanilla ice cream, for serving, optional [or greek yogurt, like I had]
Position an oven rack in the center of the oven and preheat to 350 degrees F.
Peel, core, and slice apples into 1/4-inch slices [I didn't peel them because I don't mind having peels involved]. Place apples in a large mixing bowl and toss with sugar, lemon juice, flour, and cinnamon. Pour into a lightly greased 9 by 13-inch baking dish, and spread out into an even layer. Set aside.
In another large bowl, mix together the nuts, flour, oats, sugar, cinnamon, and salt for the topping. Using a pastry cutter or your fingers, gently work in the cold butter until pea-sized lumps are formed.
Top apples evenly with mixture and bake until apples are bubbly and topping is golden brown, about 45 minutes, rotating once halfway through cooking.
Filling
4 large Golden Delicious apples (about 3 pounds) [I used 4 or 5 smaller apples]
1/4 cup sugar
1 lemon, juiced [didn't have this, just sprinkled on some water]
2 tablespoons all-purpose flour
1/2 teaspoon ground cinnamon
Topping
1 cup walnuts or pecans, roughly chopped [didn't use this, but probably would be good]
1 cup all-purpose flour [too much! probably use 1/2 cup]
1 1/4 cups rolled oats [maybe start with 1 cup instead]
1/2 cup packed dark brown sugar
1 teaspoon ground cinnamon
Pinch fine salt
8 tablespoons (1 stick) cold butter, cut into small pieces
Vanilla ice cream, for serving, optional [or greek yogurt, like I had]
Position an oven rack in the center of the oven and preheat to 350 degrees F.
Peel, core, and slice apples into 1/4-inch slices [I didn't peel them because I don't mind having peels involved]. Place apples in a large mixing bowl and toss with sugar, lemon juice, flour, and cinnamon. Pour into a lightly greased 9 by 13-inch baking dish, and spread out into an even layer. Set aside.
In another large bowl, mix together the nuts, flour, oats, sugar, cinnamon, and salt for the topping. Using a pastry cutter or your fingers, gently work in the cold butter until pea-sized lumps are formed.
Top apples evenly with mixture and bake until apples are bubbly and topping is golden brown, about 45 minutes, rotating once halfway through cooking.
Fantastic Peppermint Chocolate Cupcakes

Finally! A recipe that is still up on my iPad browser so I can share the actual ingredients with you. Yay! Catching up is incentive to not get behind again.
But more exciting news: THESE WERE DELICIOUS. Like, everyone loved them. I loved them. I ran out of confectioner's sugar, so they were more cream cheese savory than super sweet, and that, I think, is the difference. Also, I added cinnamon to the cupcakes because I think all desserts taste better with cinnamon (or cardamon, or something).
So make these. Even if it isn't holiday time. They are super, extra, definitively worth it. Yumtown, population: these guys.


Cupcakes
2 cups sugar
1 3/4 cups all purpose flour
3/4 cup unsweetened cocoa (best quality available) [I just used Trader Joe's]
1 1/2 teaspoons baking powder
1 1/2 teaspoons baking soda
1 teaspoon salt
1 teaspoon cinnamon [my addition]
2 eggs
1 cup whole milk
1/2 cup vegetable oil
2 teaspoons vanilla extract (best quality available)
1 cup boiling water
Line muffin tin with paper liners. Heat oven to 350*F.
In a large mixing bowl, stir together sugar, flour, cocoa, baking powder, baking soda and salt.
Add eggs, milk, oil and vanilla. Beat on medium speed for one minute.
Stir in boiling water (the batter will be thin, don’t worry, this is right).
Fill liners 2/3 full with batter. (I usually put the batter into a large measuring cup with a pour spout, and then pour the batter into the liners.)
Bake cupcakes for approximately 22-24 minutes.
Cool completely on wire rack before frosting.
Frosting
1/2 cup (1 stick, 8 Tablespoons) butter, at room temperature
6 oz. cream cheese, at room temperature (about 3/4 of a regular block of cream cheese)
4 cups powdered confectioners sugar [I probably only used 3 cups]
1 teaspoon pure peppermint extract [didn't have this, I mixed in 4 crushed candy canes]
1/2 teaspoons pure vanilla extract
1 to 3 Tablespoons heavy cream, heavy whipping cream (or milk- although I do like the richness that cream adds)
Place butter in a large mixing bowl and blend slightly. Add cream cheese and blend until combined, about 30 seconds.
Add powdered sugar (a little at a time) and blend on low speed until combined. Increase to medium speed and beat until it begins to get fluffy.
Add vanilla and peppermint extracts.
Slowly add the heavy cream, a little bit at a time until desired consistency is met. (Don’t add too much if you want the frosting to stay in place when piped on cupcakes.)
Beat until fluffy, about 1 minute.
[I put 4 or 5 candy canes in a bag and beat it pretty much to dust using my rolling pin {you're welcome, neighbors} and then mixed that in at the end with a spoon, not the mixer.]
Use at once or keep refrigerated. (This frosting will keep well in the refrigerator for several days, but you may need to re-beat it for the best texture.) [I took these to work and transported the cupcakes and frosting separately so it wasn't a hot mess. I'm learning!]
To achieve the red stripe in the frosting: Before filling a large piping bag with frosting, add some red gel food coloring to a toothpick, and draw two (vertical) lines with the red dye on the inside of the piping bag. Then carefully fill the piping bag with frosting. Squeeze some frosting into a bowl until you begin to see the red stripe, then frost the cupcakes.
[I mostly failed at this because I was lazy and just swirled in red food coloring to the frosting and then frosted. Whatever, pink is still festive and communicates the point.]
Top cupcakes with some crushed candy canes (they will ”melt” after a bit, so they need to be served right away) or a small piece of peppermint bark (I used a little peppermint Andes candy).
Sunday, February 9, 2014
Christmas Cupcakes
Super simple, just wanted to make some cupcakes to take to work that were Christmas-y. Plus I love using food coloring (ask my mom - I used to make awfully colored pancakes as a kid, you're welcome for helping with brunch) and seem to always have a lot of holiday sprinkles in stock.
Trader Joe's cocoa powder provided the recipe for this one, and then I just made basic frosting to go with. I think I did a basic butter and powdered sugar frosting, but must have added a bit of milk and vanilla to have the consistency (less stiff). But potentially that's just an effect of my proportions and/or food coloring.


Trader Joe's "The Greatest and Easiest Chocolate Cake"
3 1/3 cup flour
1 1/3 cup cocoa
3 cups sugar
1 tbsp baking soda
1 tsp salt
12 oz butter
3 cups buttermilk (I likely used regular milk)
5 eggs
1 tsp vanilla
Preheat oven to 350 degrees
Grease and flour two 9" round baking pans or line cupcake cups with liners
Place all ingredients in electric mixer bowl and beat on high speed for 3 minutes, scraping down sides of bowl once during mixing. Pour into prepared pans or cupcake cups [I like to pour into a measuring cup with spout to make this easier to use a measuring cup to scoop and pour - mostly for neatness sake]. Bake cakes for about 55 min or cupcakes for 20-25 minutes, until toothpick comes out clean.
Let cool before frosting; otherwise, they will make the frosting melty and make a mess.
[I usually don't use all the frosting, so perhaps use half the recipe for starters]
2 sticks butter, at room temperature
3 cups confectioners’ sugar
1 teaspoon salt
1 teaspoon vanilla extract
2 tablespoons whole milk
In a large bowl, or in the bowl of a stand mixer, combine butter, confectioners’ sugar, and salt. Beat on low speed until combined, about 2 minutes. Scrape the sides of the bowl with a spatula, then increase speed to medium high and beat until fluffy, about 3 minutes. Stop mixer, add the vanilla and milk, then continue beating 3 minutes on medium high on a stand mixer, or 5 minutes on a handheld mixer.
Trader Joe's cocoa powder provided the recipe for this one, and then I just made basic frosting to go with. I think I did a basic butter and powdered sugar frosting, but must have added a bit of milk and vanilla to have the consistency (less stiff). But potentially that's just an effect of my proportions and/or food coloring.
3 1/3 cup flour
1 1/3 cup cocoa
3 cups sugar
1 tbsp baking soda
1 tsp salt
12 oz butter
3 cups buttermilk (I likely used regular milk)
5 eggs
1 tsp vanilla
Preheat oven to 350 degrees
Grease and flour two 9" round baking pans or line cupcake cups with liners
Place all ingredients in electric mixer bowl and beat on high speed for 3 minutes, scraping down sides of bowl once during mixing. Pour into prepared pans or cupcake cups [I like to pour into a measuring cup with spout to make this easier to use a measuring cup to scoop and pour - mostly for neatness sake]. Bake cakes for about 55 min or cupcakes for 20-25 minutes, until toothpick comes out clean.
Let cool before frosting; otherwise, they will make the frosting melty and make a mess.
[I usually don't use all the frosting, so perhaps use half the recipe for starters]
2 sticks butter, at room temperature
3 cups confectioners’ sugar
1 teaspoon salt
1 teaspoon vanilla extract
2 tablespoons whole milk
In a large bowl, or in the bowl of a stand mixer, combine butter, confectioners’ sugar, and salt. Beat on low speed until combined, about 2 minutes. Scrape the sides of the bowl with a spatula, then increase speed to medium high and beat until fluffy, about 3 minutes. Stop mixer, add the vanilla and milk, then continue beating 3 minutes on medium high on a stand mixer, or 5 minutes on a handheld mixer.
Chocolate Chocolate Chip Cookies
A while ago, I made these cookies to take in to work. I can't remember if there was an occasion or not, nor can I find the bookmarked recipe. So am I helpful or what?! The moral of this post is that doubling chocolate is always good and everyone likes cookies. I'm pretty confident I just made a basic chocolate cooking recipe with cocoa powder and then mixed in chocolate chips.


Friday, December 21, 2012
iced gingerbread cookies
Looks like my posts/recipes are out of chronological order. I suppose it doesn't matter too much. I'm letting my phone connect to google plus so I can access my cooking phone photos via blogger directly without having to download them and take up memory I don't have available on my grandpa of a computer, but g+ seems to be willy nilly picking them and not going in any order. As you wish, google.
I made this recipe a few nights ago because I had some free time, and I felt like doing something that might make me feel a little more in the Christmas spirit. I had made gingerbread cookies a few weeks ago when I first got to NYC and had time to kill during Hurricane Sandy, and they turned out really well. I used a different recipe for these, and they were a lot drier. They crumbled from dough to rolling. I gave up on rolling and just balled them up and flattened them out, hence their plain jane shape. Then I was grateful for our funky oven and having a dish of water to keep them moist; otherwise, I'm sure they'd have been dry and terrible. Luckily they turned out okay, and once I put the icing on, I was surprised that they were actually pretty good. A stroke of luck and sugar. I decided to decorate them in Christmas colors as well as good luck cookies for my roommate's finals! I'm pretty sure she nailed them, and I'll take a point or two of credit from the snacks. :)


3/4 cup packed dark brown sugar
1 stick butter or margarine, softened
2 large eggs
1/4 cup molasses
3 3/4 cups all-purpose flour, plus more for dusting work surface
2 teaspoons ground ginger
1 1/2 teaspoons baking soda
1/2 teaspoon ground cinnamon
1/2 teaspoon freshly grated nutmeg
1/2 teaspoon salt
1 cup confectioners' sugar, sifted
1 to 2 tablespoons milk
Food coloring, as desired
*I loosely measured and then added milk and sugar until I got a consistency that was spreadable but would harden after a bit
Using an electric mixer at low speed, cream the sugar and butter until thoroughly combined. Add the eggs and molasses and mix until combined. Sift together the flour, ginger, baking soda, cinnamon, nutmeg, and salt. Add the dry ingredients to the butter mixture and combine with a spoon or spatula.
Remove the dough from the bowl and wrap in plastic wrap; place in the refrigerator until firm, about 1 hour.
Preheat the oven to 350 degrees F.
Line cookie sheets with parchment paper. Allow the dough to sit at room temperature for about 15 minutes, until pliable. Take about 1/2 cup of dough at a time and roll onto a floured board until about 1/8-inch thick. Cut out with gingerbread boy and girl cookie cutters. You can re-roll the scraps. Using a spatula, transfer the cookies from the board to the prepared cookie sheets.
Bake for 10 minutes, until just beginning to brown at the edges. Transfer to wire racks to cool.
To make the icing, combine the confectioners' sugar and milk. Divide the mixture into thirds; leave 1/3 white, and color 1/3 green and the final third red. Decorate piping eyes, mouths, buttons, and bow ties.
I made this recipe a few nights ago because I had some free time, and I felt like doing something that might make me feel a little more in the Christmas spirit. I had made gingerbread cookies a few weeks ago when I first got to NYC and had time to kill during Hurricane Sandy, and they turned out really well. I used a different recipe for these, and they were a lot drier. They crumbled from dough to rolling. I gave up on rolling and just balled them up and flattened them out, hence their plain jane shape. Then I was grateful for our funky oven and having a dish of water to keep them moist; otherwise, I'm sure they'd have been dry and terrible. Luckily they turned out okay, and once I put the icing on, I was surprised that they were actually pretty good. A stroke of luck and sugar. I decided to decorate them in Christmas colors as well as good luck cookies for my roommate's finals! I'm pretty sure she nailed them, and I'll take a point or two of credit from the snacks. :)


3/4 cup packed dark brown sugar
1 stick butter or margarine, softened
2 large eggs
1/4 cup molasses
3 3/4 cups all-purpose flour, plus more for dusting work surface
2 teaspoons ground ginger
1 1/2 teaspoons baking soda
1/2 teaspoon ground cinnamon
1/2 teaspoon freshly grated nutmeg
1/2 teaspoon salt
1 cup confectioners' sugar, sifted
1 to 2 tablespoons milk
Food coloring, as desired
*I loosely measured and then added milk and sugar until I got a consistency that was spreadable but would harden after a bit
Using an electric mixer at low speed, cream the sugar and butter until thoroughly combined. Add the eggs and molasses and mix until combined. Sift together the flour, ginger, baking soda, cinnamon, nutmeg, and salt. Add the dry ingredients to the butter mixture and combine with a spoon or spatula.
Remove the dough from the bowl and wrap in plastic wrap; place in the refrigerator until firm, about 1 hour.
Preheat the oven to 350 degrees F.
Line cookie sheets with parchment paper. Allow the dough to sit at room temperature for about 15 minutes, until pliable. Take about 1/2 cup of dough at a time and roll onto a floured board until about 1/8-inch thick. Cut out with gingerbread boy and girl cookie cutters. You can re-roll the scraps. Using a spatula, transfer the cookies from the board to the prepared cookie sheets.
Bake for 10 minutes, until just beginning to brown at the edges. Transfer to wire racks to cool.
To make the icing, combine the confectioners' sugar and milk. Divide the mixture into thirds; leave 1/3 white, and color 1/3 green and the final third red. Decorate piping eyes, mouths, buttons, and bow ties.
Tuesday, July 10, 2012
lime tartlets
Okay, I'll admit that these are a bit too lime and tart, but I think that is largely due to the chunks of rind in mine because I had limited food processor space/skills (I could have improved on that with more thinking and problem solving) and also maybe lime rind is just more intense than lemon. The recipe (from SK of course) calls for a whole lemon, and I can confidently assert that that would be delicious. I didn't have a lemon, though, on Sunday night at 8 pm when I decided a 4-hour baking endeavor was exactly what was going to happen, so I just used a lime. I then blended in a few strawberries into the batter to make half into strawberry-limeade-esque tarts, which toned down the limeyness a bit. All in all, I still enjoy eating them, but next time they will be better. I did learn, though, that I could substitute fruits and the overall texture and filling would still work for the tart, which I will play with more in the future.

In terms of the crust, it tasted good and worked well, but I think the doubling up on mine was too thick. Maybe I didn't roll mine out thin enough or I'm not sure what, but next time it will be more under control. That said, it wasn't a terribly difficult recipe and did taste good. I will say that I loved the pie crusts I made for my thanksgiving pies, so I might try that recipe next time and see how that works (though it did shrink a bit and this one really doesn't, if that informs your choices).



Pie Crust
Makes enough for one 9-inch tart crust [or 4-5 4-inch tart crusts, like mine]
1 1/2 cups all-purpose flour
1/2 cup confectioner’s sugar
1/4 teaspoon salt
1 stick plus 1 tablespoon (9 tablespoons; 4 1/2 ounces) very cold (or frozen) unsalted butter, cut into small pieces
1 large egg
1. Pulse the flour, sugar and salt together in the bowl of a food processor. Scatter the pieces of butter over the dry ingredients and pulse until the butter is coarsely cut in. (You’re looking for some pieces the size of oatmeal flakes and some the size of peas.) Stir the egg, just to break it up, and add it a little at a time, pulsing after each addition. When the egg is in, process in long pulses–about 10 seconds each–until the dough, which will look granular soon after the egg is added, forms clumps and curds. Just before you reach this stage, the sound of the machine working the dough will change–heads up. Turn the dough out onto a work surface and, very lightly and sparingly, knead the dough just to incorporate any dry ingredients that might have escaped mixing. Chill the dough, wrapped in plastic, for about 2 hours before rolling.
2. To roll the dough: Butter a 9-inch fluted tart pan with a removable bottom. Roll out chilled dough on floured sheet of parchment paper to 12-inch round, lifting and turning dough occasionally to free from paper. (Alternately, you can roll this out between two pieces of plastic, though flour the dough a bit anyway.) Using paper as aid, turn dough into 9-inch-diameter tart pan with removable bottom; peel off paper. Seal any cracks in dough. Trim overhang to 1/2 inch. Fold overhang in, making double-thick sides. Pierce crust all over with fork.
Alternately, you can press the dough in as soon as it is processed: Press it evenly across the bottom and up the sides of the tart shell. You want to press hard enough that the pieces cling to one another, but not so hard that it loses its crumbly texture.
3. Freeze the crust for at least 30 minutes, preferably longer, before baking.
4. To fully or partially bake the crust: Center a rack in the oven and preheat the oven to 375 degrees F. Butter the shiny side of a piece of aluminum foil (or use nonstick foil) and fit the foil, buttered side down, tightly against the crust. And here is the very best part: Since you froze the crust, you can bake it without weights. Put the tart pan on a baking sheet and bake the crust for 20 to 25 minutes.
5. Carefully remove the foil. If the crust has puffed, press it down gently with the back of a spoon. Bake the crust about 10 minutes longer to fully bake it, or until it is firm and golden brown, brown being the important word: a pale crust doesn’t have a lot of flavor. (To partially bake it, only an additional 5 minutes is needed.) Transfer the pan to a rack and cool the crust to room temperature, and proceed with the rest of your recipe.
Do ahead: The dough can be wrapped and kept in the refrigerator for up to 5 days or frozen for up to 2 months. While the fully baked crust can be packed airtight and frozen for up to 2 months, the flavor will be fresher bake it directly from the freezer, already rolled out.


Filling
1 average-sized lemon (about 4 1/2 ounces; 130 grams), rinsed and dried*
1 1/2 cups (300 grams) sugar
1 stick (4 ounces or 115 grams) unsalted butter, cut into chunks
4 large eggs
2 tablespoons (14 grams) cornstarch
1/4 teaspoon table salt
Center a rack in the oven and preheat the oven 350°F (165´C). Place the tart shell on a baking sheet, which you can line with foil or parchment paper to make any spills a breeze to clean up.
Slice the lemon into thin wheels, remove any seeds, and toss the rounds — lemon flesh and peel — sugar and chunks of butter into the container of a food processor. Process, scraping down the sides of the container as needed, until the lemon is thoroughly pureed. Add the eggs, cornstarch and salt and pulse until the batter is smooth.
Pour into prepared tart shell. It will fill it completely but if due to slight variances in tart pans, egg sizes, lemon sizes or crust thickness, you have too much, do not pour it past the top of of your crust or it will become difficult to unmold later.
Bake for 35 to 40 minutes or until the filling is set. You can test this by bumping the pan a little; it should only jiggle slightly. In my oven, I find that the point at which the filling is set is also when it starts to get very light brown on top.
Let cool on rack, unmold tart pan and serve. I actually prefer this tart completely chilled, which makes it a great dessert to make in advance of a dinner or party.
* Meyer lemons are the first choice here. They’re milder with thinner skin. But if you know that you do not mind a stronger lemon and rind kick, feel free to use a regular lemon, which will have a stronger flavor and a higher proportion of skin to flesh. If your lemon is not 4 1/2 ounces (Meyers often weigh in closer to 4 ounces) go ahead and cut a wedge out of a second one to keep the lemon flavor in balance with the sweetness of the tart.

In terms of the crust, it tasted good and worked well, but I think the doubling up on mine was too thick. Maybe I didn't roll mine out thin enough or I'm not sure what, but next time it will be more under control. That said, it wasn't a terribly difficult recipe and did taste good. I will say that I loved the pie crusts I made for my thanksgiving pies, so I might try that recipe next time and see how that works (though it did shrink a bit and this one really doesn't, if that informs your choices).

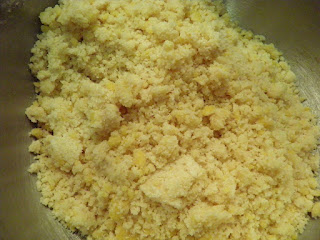
crumbly dough - post food-processing, mixing the egg in, pre-rolling out


above: pre-pre-baking
below: pre-baked, ready for a bit more baking without foil before putting in the filling

Pie Crust
Makes enough for one 9-inch tart crust [or 4-5 4-inch tart crusts, like mine]
1 1/2 cups all-purpose flour
1/2 cup confectioner’s sugar
1/4 teaspoon salt
1 stick plus 1 tablespoon (9 tablespoons; 4 1/2 ounces) very cold (or frozen) unsalted butter, cut into small pieces
1 large egg
1. Pulse the flour, sugar and salt together in the bowl of a food processor. Scatter the pieces of butter over the dry ingredients and pulse until the butter is coarsely cut in. (You’re looking for some pieces the size of oatmeal flakes and some the size of peas.) Stir the egg, just to break it up, and add it a little at a time, pulsing after each addition. When the egg is in, process in long pulses–about 10 seconds each–until the dough, which will look granular soon after the egg is added, forms clumps and curds. Just before you reach this stage, the sound of the machine working the dough will change–heads up. Turn the dough out onto a work surface and, very lightly and sparingly, knead the dough just to incorporate any dry ingredients that might have escaped mixing. Chill the dough, wrapped in plastic, for about 2 hours before rolling.
2. To roll the dough: Butter a 9-inch fluted tart pan with a removable bottom. Roll out chilled dough on floured sheet of parchment paper to 12-inch round, lifting and turning dough occasionally to free from paper. (Alternately, you can roll this out between two pieces of plastic, though flour the dough a bit anyway.) Using paper as aid, turn dough into 9-inch-diameter tart pan with removable bottom; peel off paper. Seal any cracks in dough. Trim overhang to 1/2 inch. Fold overhang in, making double-thick sides. Pierce crust all over with fork.
Alternately, you can press the dough in as soon as it is processed: Press it evenly across the bottom and up the sides of the tart shell. You want to press hard enough that the pieces cling to one another, but not so hard that it loses its crumbly texture.
3. Freeze the crust for at least 30 minutes, preferably longer, before baking.
4. To fully or partially bake the crust: Center a rack in the oven and preheat the oven to 375 degrees F. Butter the shiny side of a piece of aluminum foil (or use nonstick foil) and fit the foil, buttered side down, tightly against the crust. And here is the very best part: Since you froze the crust, you can bake it without weights. Put the tart pan on a baking sheet and bake the crust for 20 to 25 minutes.
5. Carefully remove the foil. If the crust has puffed, press it down gently with the back of a spoon. Bake the crust about 10 minutes longer to fully bake it, or until it is firm and golden brown, brown being the important word: a pale crust doesn’t have a lot of flavor. (To partially bake it, only an additional 5 minutes is needed.) Transfer the pan to a rack and cool the crust to room temperature, and proceed with the rest of your recipe.
Do ahead: The dough can be wrapped and kept in the refrigerator for up to 5 days or frozen for up to 2 months. While the fully baked crust can be packed airtight and frozen for up to 2 months, the flavor will be fresher bake it directly from the freezer, already rolled out.


Filling
1 average-sized lemon (about 4 1/2 ounces; 130 grams), rinsed and dried*
1 1/2 cups (300 grams) sugar
1 stick (4 ounces or 115 grams) unsalted butter, cut into chunks
4 large eggs
2 tablespoons (14 grams) cornstarch
1/4 teaspoon table salt
Center a rack in the oven and preheat the oven 350°F (165´C). Place the tart shell on a baking sheet, which you can line with foil or parchment paper to make any spills a breeze to clean up.
Slice the lemon into thin wheels, remove any seeds, and toss the rounds — lemon flesh and peel — sugar and chunks of butter into the container of a food processor. Process, scraping down the sides of the container as needed, until the lemon is thoroughly pureed. Add the eggs, cornstarch and salt and pulse until the batter is smooth.
Pour into prepared tart shell. It will fill it completely but if due to slight variances in tart pans, egg sizes, lemon sizes or crust thickness, you have too much, do not pour it past the top of of your crust or it will become difficult to unmold later.
Bake for 35 to 40 minutes or until the filling is set. You can test this by bumping the pan a little; it should only jiggle slightly. In my oven, I find that the point at which the filling is set is also when it starts to get very light brown on top.
Let cool on rack, unmold tart pan and serve. I actually prefer this tart completely chilled, which makes it a great dessert to make in advance of a dinner or party.
* Meyer lemons are the first choice here. They’re milder with thinner skin. But if you know that you do not mind a stronger lemon and rind kick, feel free to use a regular lemon, which will have a stronger flavor and a higher proportion of skin to flesh. If your lemon is not 4 1/2 ounces (Meyers often weigh in closer to 4 ounces) go ahead and cut a wedge out of a second one to keep the lemon flavor in balance with the sweetness of the tart.
Friday, February 17, 2012
blondies
My boyfriend is off to Louisiana this weekend to play in a tournament and go to Mardi Gras, so I wanted to make some snacks for the road trip. I made some banana bread muffins (I used the Joy recipe and didn't love it - they were fine but pretty plain) and decided to also make blondies as my sister has been asking for them for a while, so I thought I'd make two people happy! I've never been a big blondies fan but I liked the way these tasted. And hey, that melted butter and sugar mixture was pretty excellent!


1 cup all-purpose flour
1/4 tsp baking powder
1/8 tsp baking soda
1/8 tsp salt
1/2 cup (1 stick) unsalted butter
2/3 cup packed brown sugar
1/4 cup sugar
1 large egg
1 large egg yolk
1 tbsp light corn syrup [I always just substitute honey]
1.5 tsp vanilla
Preheat oven to 350F.
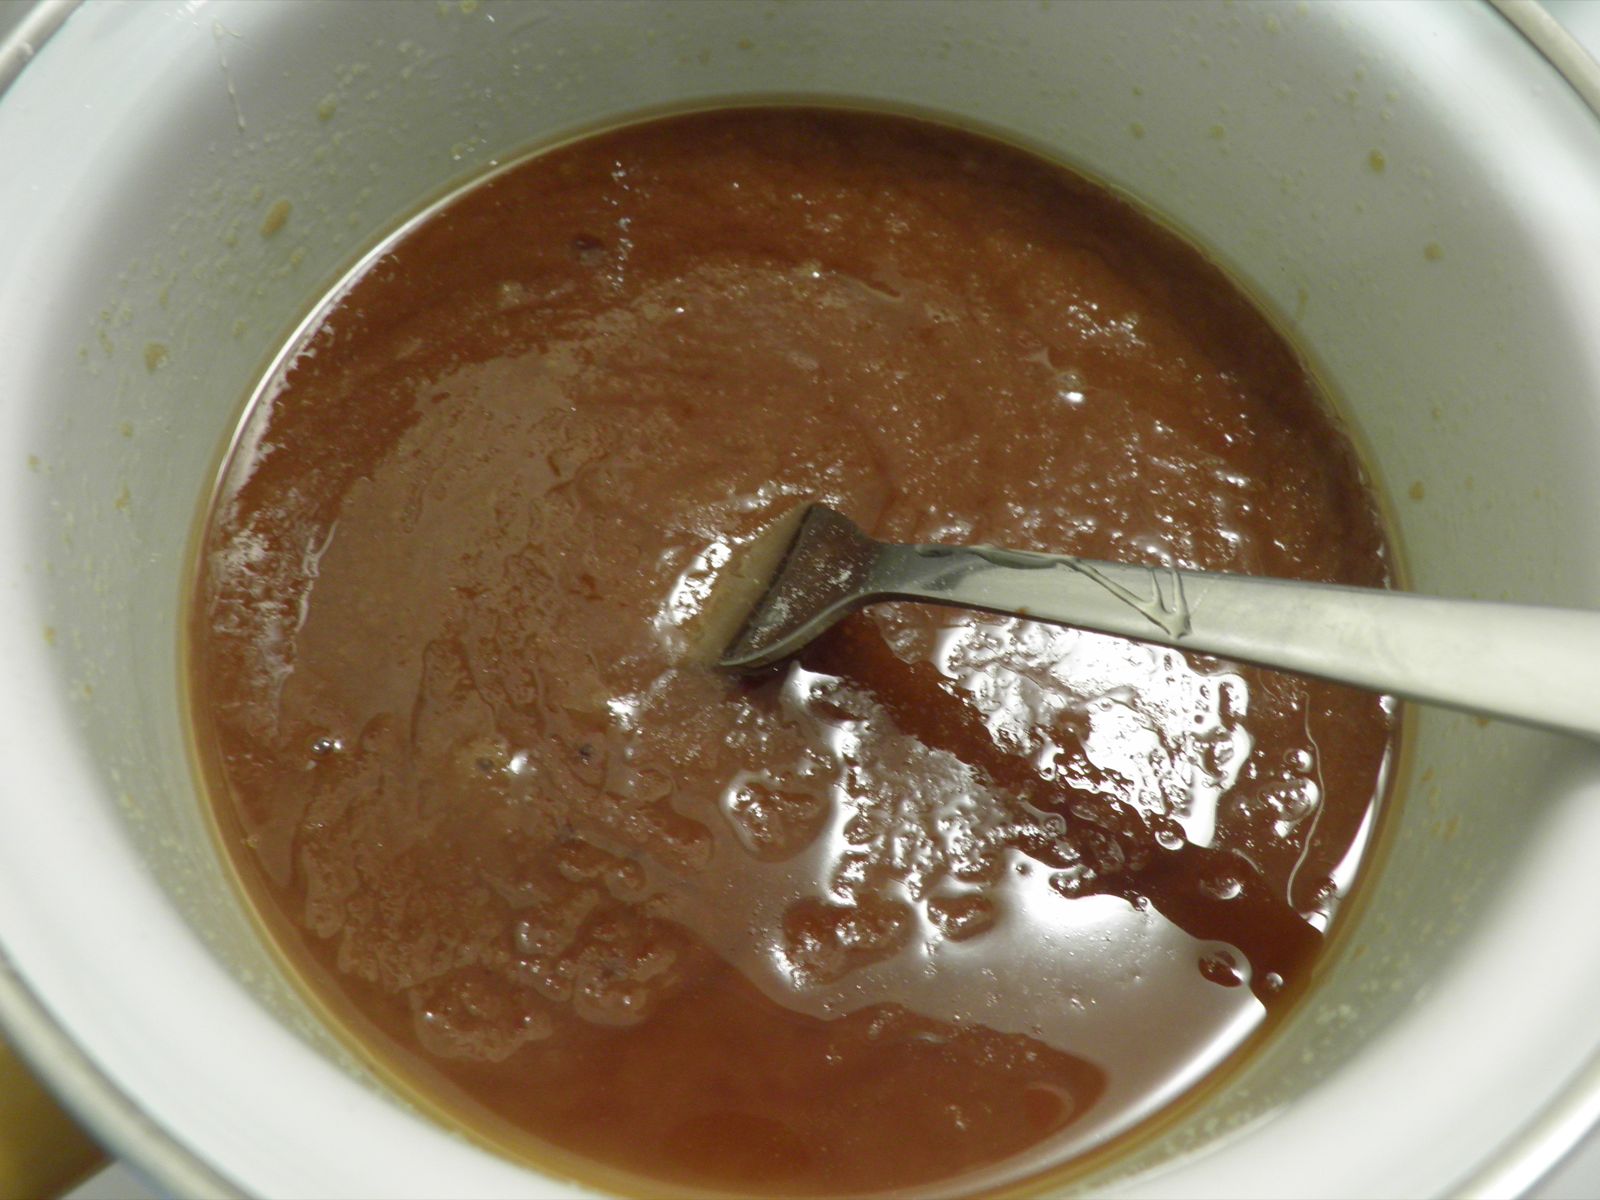
In a saucepan, melt the butter and then boil, stirring constantly until light golden brown, about 4 minutes. Remove from heat and stir in brown sugar and sugar until well blended. Let cool to barely warm. Stir in egg, yolk, syrup/honey, and vanilla until well combined.
Whisk together flour, baking powder, baking soda, and salt. Stir into liquid mixture. Scrape into a greased pan. Bake until golden brown and toothpick in center comes out clean, about 25 to 30 minutes.


1 cup all-purpose flour
1/4 tsp baking powder
1/8 tsp baking soda
1/8 tsp salt
1/2 cup (1 stick) unsalted butter
2/3 cup packed brown sugar
1/4 cup sugar
1 large egg
1 large egg yolk
1 tbsp light corn syrup [I always just substitute honey]
1.5 tsp vanilla
Preheat oven to 350F.
In a saucepan, melt the butter and then boil, stirring constantly until light golden brown, about 4 minutes. Remove from heat and stir in brown sugar and sugar until well blended. Let cool to barely warm. Stir in egg, yolk, syrup/honey, and vanilla until well combined.
Whisk together flour, baking powder, baking soda, and salt. Stir into liquid mixture. Scrape into a greased pan. Bake until golden brown and toothpick in center comes out clean, about 25 to 30 minutes.
Wednesday, February 15, 2012
valentines: molten chocolate cake
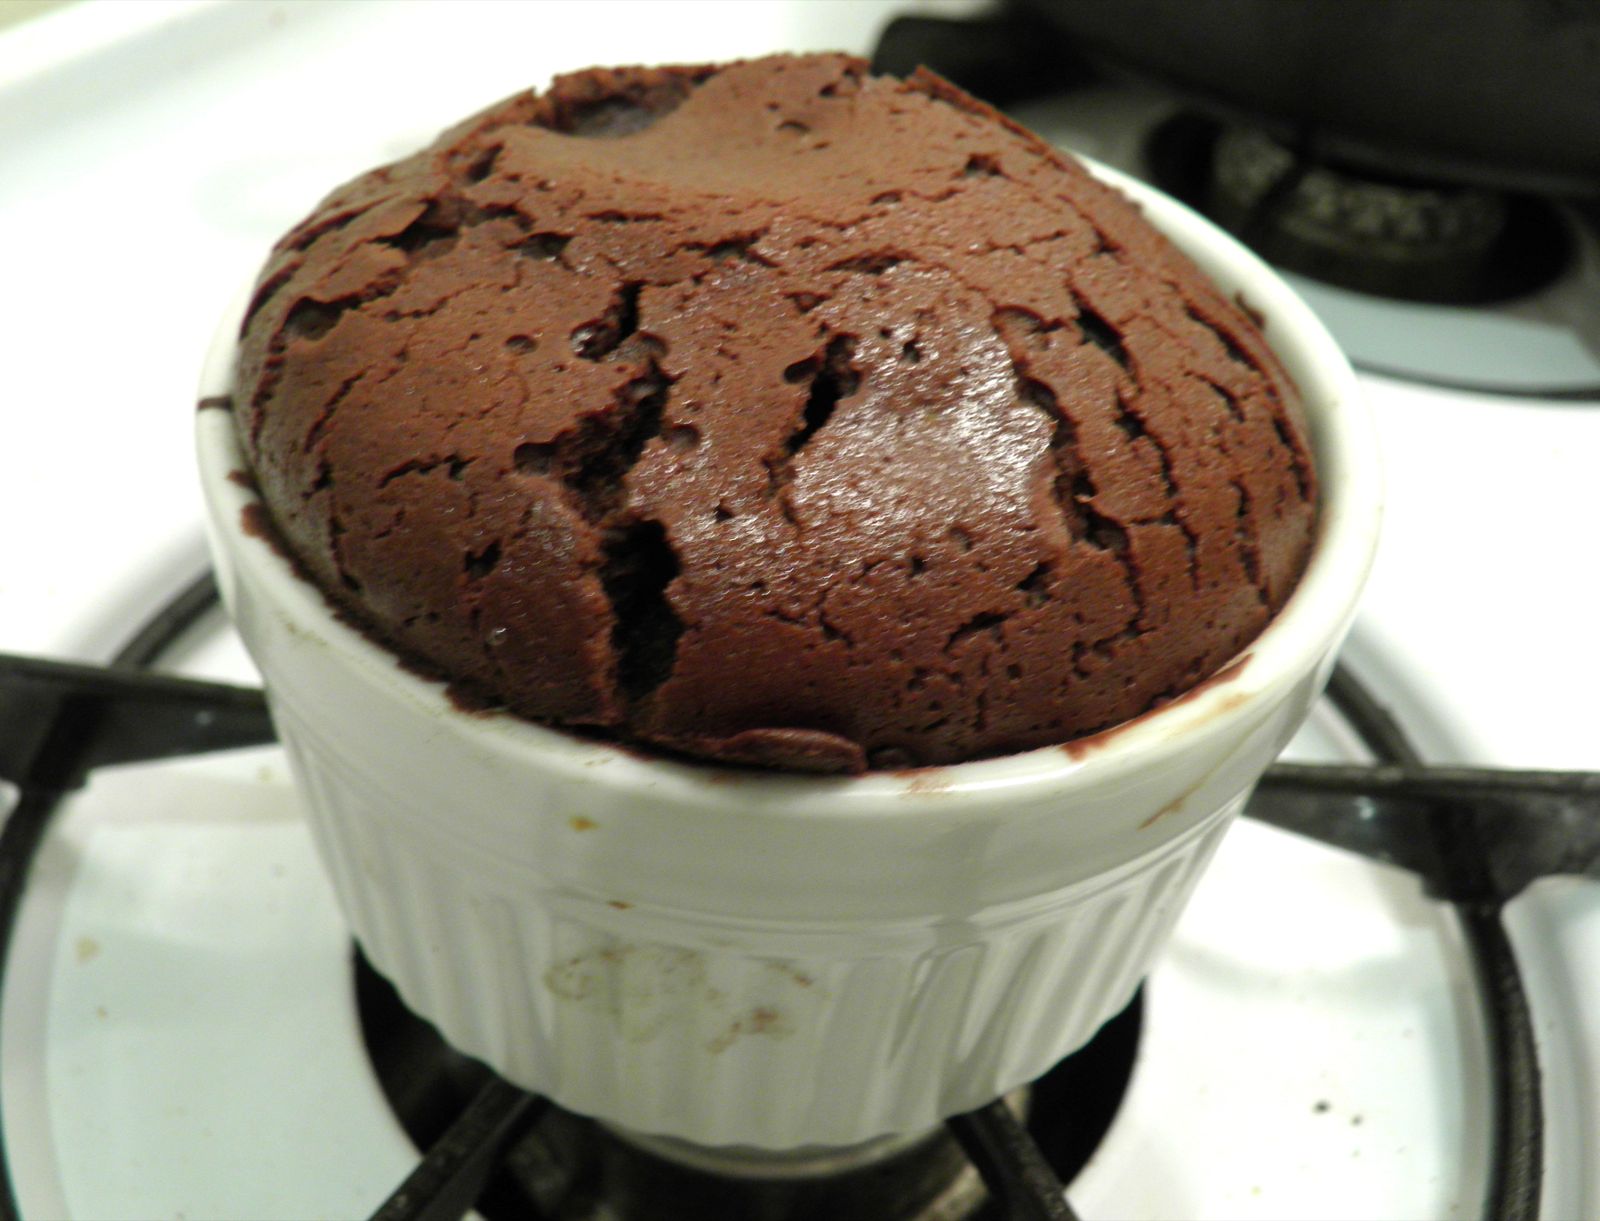
I was going to make my souffle cupcakes with white chocolate cream for my special valentine's dessert, but as I'm not very observant, I ended up having 2 kinds of chocolate and 0 kinds of white chocolate in the pantry. And as much as I wanted to make my boyfriend an incredible dessert, I wasn't going to the grocery store at 5 pm on v-day. So I spent about 20 minutes prowling the interwebs for a good chocolatey recipe (little did I realize that our dinner would be straight out of Chocolat) and found this one for a molten chocolate cake. First of all, it was delicious and I was very proud of it. Second of all, it was very easy. Third of all, I sort of expected that lava centered melted explosion to happen, but that is not this cake. It is denser and moister in the middle, so I can see the "molten" part, but if you want the chocolate to come pouring out, I don't know. Find a different recipe, I guess. My boyfriend suggested that you have to stick a hershey's kiss or something in the middle, but I haven't tested that theory yet.


*I make 1/2 the recipe for 2 servings, below is the full recipe
1 stick unsalted butter, plus melted butter for brushing
1 tablespoon unsweetened cocoa powder
1/4 cup plus 1 tablespoon all-purpose flour
6 ounces dark chocolate (70 percent cacao), chopped
1/2 cup granulated sugar
3 large eggs, at room temperature
Pinch of salt
Confectioners' sugar for sprinkling
Preheat the oven to 425°. Brush four 6-ounce ramekins with melted butter. In a small bowl, whisk the cocoa powder with 1 tablespoon of the flour; dust the ramekins with the cocoa mixture, tapping out the excess. Transfer the ramekins to a sturdy baking sheet.
In a medium saucepan, melt 1 stick of butter with the chocolate over very low heat, stirring occasionally. Let cool slightly.
In a bowl, using an electric mixer, beat the granulated sugar with the eggs and salt at medium-high speed until thick and pale yellow, 3 minutes. Using a rubber spatula, fold in the melted chocolate until no streaks remain. Fold in the 1/4 cup of flour. [We ended up having a lot of time left to cook dinner and this was already ready, but I knew I wanted to serve it warm. I let it sit out for a while and then refrigerated it for a while, and there didn't seem to be any problem - just in case you find you need to do the same. It's definitely key to serve it warm. And probably with whipped cream or ice cream, even though it is crazy dense and filling.]
Spoon the batter into the prepared ramekins. Bake in the center of the oven for 16 minutes, until the tops are cracked but the centers are still slightly jiggly. Transfer the ramekins to a rack and let cool for 5 to 8 minutes.
Run the tip of a small knife around each cake to loosen. Invert a small plate over each cake and, using pot holders, invert again. Carefully lift off the ramekins. Dust the warm cakes with confectioners’ sugar and serve immediately.



*I make 1/2 the recipe for 2 servings, below is the full recipe
1 stick unsalted butter, plus melted butter for brushing
1 tablespoon unsweetened cocoa powder
1/4 cup plus 1 tablespoon all-purpose flour
6 ounces dark chocolate (70 percent cacao), chopped
1/2 cup granulated sugar
3 large eggs, at room temperature
Pinch of salt
Confectioners' sugar for sprinkling
Preheat the oven to 425°. Brush four 6-ounce ramekins with melted butter. In a small bowl, whisk the cocoa powder with 1 tablespoon of the flour; dust the ramekins with the cocoa mixture, tapping out the excess. Transfer the ramekins to a sturdy baking sheet.
In a medium saucepan, melt 1 stick of butter with the chocolate over very low heat, stirring occasionally. Let cool slightly.
In a bowl, using an electric mixer, beat the granulated sugar with the eggs and salt at medium-high speed until thick and pale yellow, 3 minutes. Using a rubber spatula, fold in the melted chocolate until no streaks remain. Fold in the 1/4 cup of flour. [We ended up having a lot of time left to cook dinner and this was already ready, but I knew I wanted to serve it warm. I let it sit out for a while and then refrigerated it for a while, and there didn't seem to be any problem - just in case you find you need to do the same. It's definitely key to serve it warm. And probably with whipped cream or ice cream, even though it is crazy dense and filling.]
Spoon the batter into the prepared ramekins. Bake in the center of the oven for 16 minutes, until the tops are cracked but the centers are still slightly jiggly. Transfer the ramekins to a rack and let cool for 5 to 8 minutes.
Run the tip of a small knife around each cake to loosen. Invert a small plate over each cake and, using pot holders, invert again. Carefully lift off the ramekins. Dust the warm cakes with confectioners’ sugar and serve immediately.
Monday, February 13, 2012
key lime pie
I saw key limes for sale at HEB the other day, and I just couldn't resist them. My boyfriend asked me not to make so many desserts (he has a point), but I just love making them so much! In spite of his desire for a slightly healthier cooking habit, he still helped me out by squeezing the limes (which probably wasn't too easy since they are so tiny) and bruléeing the meringue a bit more (that was mostly because he really likes playing with the torch).
I admit, this wasn't my best dessert. Changes? I would have cooked/toasted the crust more before filling it, I would have used a bit more butter in the crust, I would have let the pie cook a little longer, and I would let it cool all the way and then chill before serving it. That said, it still tastes good and was fun to make. I looked around the internet for recipes but decided upon three from the Joy of Cooking - graham cracker crust, key lime filling, and meringue I.


Crust:
1.5 cups graham cracker crumbs [I used my food processor]
1/4 to 1/2 cup sugar
6 tbsp unsalted butter, melted and cooled [I would use just a bit more]
Stir sugar and graham cracker crumbs together (with a bit of cinnamon if desired). Pour in melted butter and mix. Shape into shell in the pie pan, distributing fairly evenly and press firmly down.
Notes from Joy: Crumb crusts do not need to be baked but you have two options:
- if using unbaked, freeze for 20 minutes or the filling will soften it
- bake for 10-12 minutes at 350 degrees to make it crunchy and more flavorful (cool before filling)
Filling:
15 oz can sweetened condensed milk [I used fat free - it was just fat free milk + sugar, no corn syrup]
4 large egg yolks
1/2 cup key lime juice (12-14 key limes)
3-4 tsp grated key lime zest [not necessary but I always like the added flavor of zest]
Preheat oven to 325 F.
Whisk milk, yolks, juice, and zest together until well blended. Pour into pie crust. If not topping with meringue, bake until the center looks set but quivers when the pie is jiggled (15-17 minutes). Let cool and then refrigerate for up to 1 day. Serve with whipped cream.
If using a meringue topping, bake the pie until it thickens just enough to support the topping, about 5-7 minutes. Spread the meringue around the edges of the filling, anchoring it to the crust at all points. Dollop the remaining meringue over the center and smooth the top. Bake for 20 minutes more. Let cool completely on a rack, then refrigerate up to 1 day.
Meringue:
1 tbsp cornstarch
1 tbsp sugar
1/2 cup water
4 large egg whites [conveniently the same number of egg yolks you need for the filling]
1/2 tsp vanilla
1/4 tsp cream of tartar
1/2 cup sugar
Mix cornstarch and sugar in a saucepan. Gradually stir in water, making a smooth, runny paste. Bring to a boil over medium heat, stirring briskly all the while, then boil for 15 seconds. Remove the thick paste from heat and cover.
Beat egg whites until foamy. Add vanilla and cream of tartar until soft peaks form. Very gradually beat in sugar. Beat on high speed until peaks are very stiff and glossy but not dry. Reduce speed to very low and beat in the cornstarch paste 1 tbsp at a time. When all the paste is incorporated, increase speed to medium and beat for 10 seconds. Spread over a hot pie filling and bake as directed.
Nutritional information (for 1/10 of crust + filling + meringue) [using fat-free condensed milk]
359 total calories
10g total fat
61g total carbs
7g protein
I admit, this wasn't my best dessert. Changes? I would have cooked/toasted the crust more before filling it, I would have used a bit more butter in the crust, I would have let the pie cook a little longer, and I would let it cool all the way and then chill before serving it. That said, it still tastes good and was fun to make. I looked around the internet for recipes but decided upon three from the Joy of Cooking - graham cracker crust, key lime filling, and meringue I.


Crust:
1.5 cups graham cracker crumbs [I used my food processor]
1/4 to 1/2 cup sugar
6 tbsp unsalted butter, melted and cooled [I would use just a bit more]
Stir sugar and graham cracker crumbs together (with a bit of cinnamon if desired). Pour in melted butter and mix. Shape into shell in the pie pan, distributing fairly evenly and press firmly down.
Notes from Joy: Crumb crusts do not need to be baked but you have two options:
- if using unbaked, freeze for 20 minutes or the filling will soften it
- bake for 10-12 minutes at 350 degrees to make it crunchy and more flavorful (cool before filling)
Filling:
15 oz can sweetened condensed milk [I used fat free - it was just fat free milk + sugar, no corn syrup]
4 large egg yolks
1/2 cup key lime juice (12-14 key limes)
3-4 tsp grated key lime zest [not necessary but I always like the added flavor of zest]
Preheat oven to 325 F.
Whisk milk, yolks, juice, and zest together until well blended. Pour into pie crust. If not topping with meringue, bake until the center looks set but quivers when the pie is jiggled (15-17 minutes). Let cool and then refrigerate for up to 1 day. Serve with whipped cream.
If using a meringue topping, bake the pie until it thickens just enough to support the topping, about 5-7 minutes. Spread the meringue around the edges of the filling, anchoring it to the crust at all points. Dollop the remaining meringue over the center and smooth the top. Bake for 20 minutes more. Let cool completely on a rack, then refrigerate up to 1 day.
Meringue:
1 tbsp cornstarch
1 tbsp sugar
1/2 cup water
4 large egg whites [conveniently the same number of egg yolks you need for the filling]
1/2 tsp vanilla
1/4 tsp cream of tartar
1/2 cup sugar
Mix cornstarch and sugar in a saucepan. Gradually stir in water, making a smooth, runny paste. Bring to a boil over medium heat, stirring briskly all the while, then boil for 15 seconds. Remove the thick paste from heat and cover.
Beat egg whites until foamy. Add vanilla and cream of tartar until soft peaks form. Very gradually beat in sugar. Beat on high speed until peaks are very stiff and glossy but not dry. Reduce speed to very low and beat in the cornstarch paste 1 tbsp at a time. When all the paste is incorporated, increase speed to medium and beat for 10 seconds. Spread over a hot pie filling and bake as directed.
Nutritional information (for 1/10 of crust + filling + meringue) [using fat-free condensed milk]
359 total calories
10g total fat
61g total carbs
7g protein
Subscribe to:
Posts (Atom)