Showing posts with label fruit. Show all posts

Wednesday, February 12, 2014

Apple Crumble

I'll be honest, this was not my favorite recipe. After I made it, I read the comments (yes because I don't learn to do that first), and I noticed many people also found it too dry. Basically, probably not the way you want to go. But the apples turned out well, and when I first got it from the oven and ate it with greek yogurt, it was delicious. It has otherwise been nice to reheat and serve with greek yogurt for breakfast. I used my excess topping that I didn't put on the apples to make a granola pie thing by mixing in peanut butter and maple syrup. Take from all that what you will.


Filling
4 large Golden Delicious apples (about 3 pounds) [I used 4 or 5 smaller apples]
1/4 cup sugar
1 lemon, juiced [didn't have this, just sprinkled on some water]
2 tablespoons all-purpose flour
1/2 teaspoon ground cinnamon

Topping
1 cup walnuts or pecans, roughly chopped [didn't use this, but probably would be good]
1 cup all-purpose flour [too much! probably use 1/2 cup]
1 1/4 cups rolled oats [maybe start with 1 cup instead]
1/2 cup packed dark brown sugar
1 teaspoon ground cinnamon
Pinch fine salt
8 tablespoons (1 stick) cold butter, cut into small pieces
Vanilla ice cream, for serving, optional [or greek yogurt, like I had]

Position an oven rack in the center of the oven and preheat to 350 degrees F.

Peel, core, and slice apples into 1/4-inch slices [I didn't peel them because I don't mind having peels involved]. Place apples in a large mixing bowl and toss with sugar, lemon juice, flour, and cinnamon. Pour into a lightly greased 9 by 13-inch baking dish, and spread out into an even layer. Set aside.

In another large bowl, mix together the nuts, flour, oats, sugar, cinnamon, and salt for the topping. Using a pastry cutter or your fingers, gently work in the cold butter until pea-sized lumps are formed.

Top apples evenly with mixture and bake until apples are bubbly and topping is golden brown, about 45 minutes, rotating once halfway through cooking.

Chocolate Chip Banana Pumpkin Oatmeal Muffins


This is absolutely a mish-mash recipe. I even had two open on my computer, neither of which I committed to following in any way. One for oatmeal pumpkin muffins and one for banana muffins. Then I mixed them, used applesauce instead of something else, and threw in some chocolate chips. Muffins are great bases for whatever you feel like cooking with or just getting out of your pantry/fridge. Don't be afraid.

At any rate, these ended up being pretty good. I calculated the calories to be around 110 each (without chocolate chips). They were definitely not dry at all, and I love anything with bananas cooked in because they get so sweet and caramely.


I can't totally remember what I did, so here's the recipe for pumpkin oatmeal muffins with my notes:

1 cup flour [possibly I did 1.5 cups but I can't recall - you can always add more if it looks too wet]
1/2 cup white sugar
1 tsp salt
1 tsp pumpkin pie spice (or apple pie spice or cinnamon/nutmeg/cloves/ginger)
3/4 tsp baking powder
1/2 tsp baking soda
1/2 tsp cinnamon
1/2 tsp nutmeg
1.25 cups pumpkin [I think I used the full 15 oz can]
1/2 cup milk [I don't think I had/used milk, just a self-serving size cup of applesauce]
2 eggs
1/4 cup maple syrup
3/4 cup oats
plus chocolate chips if you're into that
plus sliced bananas if you're into that [I think I used 3?]

Preheat oven to 375 degrees F (190 degrees C). Spray muffin cups with cooking spray or put in liners.

Whisk all-purpose flour, whole wheat flour, sugar, salt, pumpkin pie spice, baking powder, baking soda, cinnamon, and nutmeg together in a large bowl until thoroughly combined.

Stir pumpkin puree, milk, eggs, and maple syrup into the dry ingredients until batter is smooth; fold oats into batter. Scoop batter into prepared muffin cups, filling them to the top.

Bake in the preheated oven until a toothpick inserted into the center of a muffin comes out clean, 20 to 30 minutes; set aside to cool 5 to 10 minutes before serving.

Tuesday, August 21, 2012

paleo salmon salad

My friend, a rower/teammate who is now a workout trainer in Colorado, recently got hooked on the paleo diet. She posted about this salmon salad in her blog (about working out and eating paleo), and while it struck me as a strange combination of ingredients, she was really enthusiastic about it so I figured I'd give it a try. I didn't have blueberries or coconuts and subbed in dried cranberries for cherries, but man! It was delicious! I am impressed and very happy that I tried it. I'll be stocking up on canned salmon now so that this can be a go-to for me as well. Give it a try!

Apologies for the pictures - I snapped a couple on my phone, but the quality was sub-par (and worse than they normally turn out) plus the color scheme here was a bit rough to manage well. Don't let appearances fool you! You want to eat this.


1 can of salmon (wild salmon has a great omega 3 to omega 6 ratio btws)
½ cup blueberries [didn't have on hand]
¼ avocado
¼ cup unsweetened coconut flakes (the BIG kind, not the shavings) [I didn't have this]
2 Tbs golden raisins
2 Tbs dried cherries [I used cranberries instead]
dash o’salt, pepper, and onion powder
hefty drizzle: olive oil and balsamic vinegar

Basically, just mix it all together and enjoy! Also, I bet this would be pretty good if you put it on top of lettuce like a chicken salad or if you weren't paleo, mixed with quinoa or cooled pasta or something. I don't know, but it seems pretty flexible and is really just satisfying.

Nutritional Information (full recipe with my version of ingredients):
427 total calories
28.3 g total fat [but it's all good fat - salmon, avocado, olive oil]
0 g cholesterol
20 g total carbs
5 g fiber
10 g sugar
22.5 g protein

Friday, August 10, 2012

blueberry peach muffins

My mom bought some fruit while she was in town visiting me (yay for mommies), but sadly, I couldn't eat it all before it started getting too soft for my liking. So I baked it! Best solution to handling overripe fruit. This time I went with a Joy of Cooking basic muffin recipe and threw in the rest of my blueberries and two peaches (which I know are peaches thanks to some helpful identifying advice from a friend - peaches, nectarines, apricots, my brain can't keep them straight). They weren't the best muffins I've ever made - I used half and half (my mom bought it and I'll never use it otherwise), so maybe that was why? Or maybe because I used oil instead of butter, and I don't love oil? Or probably I overmixed it because it was smooth. I'm not sure but I just wasn't crazy about the texture. The fruit is yummy, though, of course, and my friends liked them enough to eat them, so problem solved.


2 cups all purpose flour
1 tbsp baking powder (make sure its not clumpy, I keep finding them in my finished products)
1/2 tsp salt
1/4 tsp grated or ground nutmeg (I also add some cinnamon and cardamom, why not?)
2 large eggs
1 cup milk or cream
2/3 cup sugar or brown sugar
1/4 to 1/2 cup (1/2 to 1 stick) butter, melted, or 1/4 to 1/2 cup oil
1 tsp vanilla

Preheat oven to 400 degrees.

Mix flour, baking powder, salt, and nutmeg together. In another bowl, whisk eggs, milk, sugar, butter/oil, and vanilla. Mix together with a few light strokes, just until the batter is moistened but not overmixed and smooth. Add in cut up fruit. Pour into muffin tin.

Bake for 17 minutes (longer with fruit) until toothpick comes out clean. Let cool for 2-3 minutes before removing from pan. Serve warm with some butter, and it's delicious!

I've found that when I keep baked goods, it is actually better to not seal them fully because they get soggy sometimes. But it depends on a lot of things. 

Sunday, July 29, 2012

cherry strawberry pie

The other day I made a half-batch of SK's delicious butter pie crust (which I have loved since I first made it for my Thanksgiving pies). It hung out in my fridge for about a week before I got around to baking into this. I followed-ish her recipe for a sweet cherry pie, but I subbed in mostly strawberries, didn't have almond extract, and used just some splashed of lemon juice from my squeeze bottle because I didn't have a fresh lemon on hand. But the great thing about dessert is that it really hates to go wrong, and I know I'm a pretty generous judge.

I didn't cook it long enough, I think, because the crust could have been flakier and more done through. Also I don't know if I used too much sugar or not enough corn starch, but I had a lot of liquid inside that I sort of poured off (but would be delicious if I was serving it with ice cream, so it isn't the worst problem). All said, I still thought it tasted delicious and sweet and summary, and I've already had almost half of it between last night and today.


Dough for a double-crust pie [I made a 1/2 recipe because I made a smaller pie]

4 cups pitted fresh cherries (about 2 1/2 pounds unpitted) [I used about a cup plus maybe two cups of strawberries]
4 tablespoons cornstarch [I used 2 tbsp]
2/3 to 3/4 cup sugar (adjust this according to the sweetness of your cherries) [I used 1/2 cup]
1/8 teaspoon salt
Juice of half a lemon
1/4 teaspoon almond extract [didn't have]
1 tablespoon cold unsalted butter, cut into small bits [I used 1/2 tbsp]

1 egg, beaten with 2 tablespoons water
Coarse sugar, for decoration

Preheat oven to 400°F.

Stir together the cherries, cornstarch, sugar, salt, lemon and almond extract gently together in a large bowl.

Roll out half of chilled dough (use larger piece, if you’ve divided them unevenly) on a floured work surface to 13-inch round. Gently place it in 9-inch pie pan, either by rolling it around the rolling pin and unrolling it over the pan or by folding it into quarters and unfolding it in the pan. Trim edges to a half-inch overhang.

Spoon filling into pie crust, discarding the majority of the liquid that has pooled in the bowl. Dot the filling with the bits of cold butter.

Roll out the remaining dough into a 12-inch round on a lightly floured surface, drape it over the filling, and trim it, leaving a 1-inch overhang. Fold the overhang under the bottom crust, pressing the edge to seal it, and crimp the edge decoratively. Brush the egg wash over over pie crust, then sprinkle with coarse sugar.

Cut slits in the crust with a sharp knife, forming steam vents, and bake the pie in the middle of the oven for 25 minutes. Reduce the temperature to 350°F. and bake the pie for 25 to 30 minutes more, or until the crust is golden. Let the pie cool on a rack. [Because mine was smaller, I watched it pretty carefully and it took about 35 minutes total.]

upside-down cherry cornmeal cake

Cherries were really cheap the other day at the store, so I bought a lot. I ate most of them, but then I went out of town. When I came back, they were not fully bad but not really that appetizing. As I hate to waste food, I've started deciding that anything that isn't fully bad should just be baked. If that's wrong, I don't want to be right because I get delicious, soft, fruit goodness out of this policy. I looked on SK for cherry recipes, and I went for this one because I had most of the ingredients.

Throughout her post, SK talked about how many things she did wrong because she did it at the last minute and was in a hurry. Well for some completely arbitrary reason, I decided I wanted to make this before a shift at the restaurant, so I was in a hurry and, of course, made a wealth of other mistakes. As a result, it didn't come out perfectly, but because I took half of it to work, most of it got eaten very quickly, and that always assuages my guilt about wasting food. And it wasn't bad. I definitely liked cooking the cherries down first and baking the whole thing in my cast iron, so it was a fun recipe to make.


[I made a half-batch because I didn't have that many cherries, and even so I had a pretty thick layer of cake on top once it baked and rose]

3/4 cup (1 1/2 sticks) unsalted butter, room temperature, divided
1/4 cup (packed) dark brown sugar
2 teaspoons balsamic vinegar
3 cups whole pitted fresh Bing cherries or other dark sweet cherries (about 21 ounces whole unpitted cherries)
1 1/4 cups all purpose flour
1/4 cup yellow cornmeal (preferably stone-ground medium grind)
2 teaspoons baking powder
1/4 teaspoon salt
1 cup sugar
2 large eggs, separated
3/4 teaspoon vanilla extract
1/2 cup whole milk
1/4 teaspoon cream of tartar

Position rack in center of oven; preheat to 350°F. Combine 1/4 cup butter with brown sugar and vinegar in 10- to 11-inch ovenproof skillet with 2-inch-high sides. Stir over medium heat until butter melts and sugar dissolves, about 2 minutes. Increase heat to high; add cherries and bring to boil. Remove from heat.

Whisk flour, cornmeal, baking powder, and salt in medium bowl to blend. Using electric mixer, beat 1/2 cup butter in large bowl. Add sugar; beat until pale and fluffy, about 3 minutes. Beat in egg yolks and vanilla. Add flour mixture alternately with milk in 2 additions each, beating just until blended and occasionally scraping down sides of bowl. Using clean dry beaters, beat egg whites in another medium bowl until foamy. Add cream of tartar and beat until whites are stiff but not dry. Using rubber spatula, fold 1/4 of whites into batter to lighten slightly. Fold in remaining whites in 3 additions (batter will be thick). Spoon batter over cherries in skillet, then spread evenly with offset spatula to cover cherries.

Bake cake until top is golden brown and tester inserted into center comes out clean, about 45 minutes. Cool in skillet on rack 5 minutes. Run spatula around edges of cake to loosen. Place large serving platter upside down atop skillet. Using pot holders or oven mitts, firmly hold platter and skillet together and invert. Leave skillet atop cake 5 minutes. Remove skillet. If necessary, rearrange any cherries that may have become dislodged. Let cake cool at least 45 minutes. Cut cake into wedges and serve slightly warm or at room temperature.

Tuesday, July 10, 2012

lime tartlets

Okay, I'll admit that these are a bit too lime and tart, but I think that is largely due to the chunks of rind in mine because I had limited food processor space/skills (I could have improved on that with more thinking and problem solving) and also maybe lime rind is just more intense than lemon. The recipe (from SK of course) calls for a whole lemon, and I can confidently assert that that would be delicious. I didn't have a lemon, though, on Sunday night at 8 pm when I decided a 4-hour baking endeavor was exactly what was going to happen, so I just used a lime. I then blended in a few strawberries into the batter to make half into strawberry-limeade-esque tarts, which toned down the limeyness a bit. All in all, I still enjoy eating them, but next time they will be better. I did learn, though, that I could substitute fruits and the overall texture and filling would still work for the tart, which I will play with more in the future.

In terms of the crust, it tasted good and worked well, but I think the doubling up on mine was too thick. Maybe I didn't roll mine out thin enough or I'm not sure what, but next time it will be more under control. That said, it wasn't a terribly difficult recipe and did taste good. I will say that I loved the pie crusts I made for my thanksgiving pies, so I might try that recipe next time and see how that works (though it did shrink a bit and this one really doesn't, if that informs your choices).
 crumbly dough - post food-processing, mixing the egg in, pre-rolling out


 above: pre-pre-baking
below: pre-baked, ready for a bit more baking without foil before putting in the filling

Pie Crust


Makes enough for one 9-inch tart crust [or 4-5 4-inch tart crusts, like mine]

1 1/2 cups all-purpose flour
1/2 cup confectioner’s sugar
1/4 teaspoon salt
1 stick plus 1 tablespoon (9 tablespoons; 4 1/2 ounces) very cold (or frozen) unsalted butter, cut into small pieces
1 large egg

1. Pulse the flour, sugar and salt together in the bowl of a food processor. Scatter the pieces of butter over the dry ingredients and pulse until the butter is coarsely cut in. (You’re looking for some pieces the size of oatmeal flakes and some the size of peas.) Stir the egg, just to break it up, and add it a little at a time, pulsing after each addition. When the egg is in, process in long pulses–about 10 seconds each–until the dough, which will look granular soon after the egg is added, forms clumps and curds. Just before you reach this stage, the sound of the machine working the dough will change–heads up. Turn the dough out onto a work surface and, very lightly and sparingly, knead the dough just to incorporate any dry ingredients that might have escaped mixing. Chill the dough, wrapped in plastic, for about 2 hours before rolling.

2. To roll the dough: Butter a 9-inch fluted tart pan with a removable bottom. Roll out chilled dough on floured sheet of parchment paper to 12-inch round, lifting and turning dough occasionally to free from paper. (Alternately, you can roll this out between two pieces of plastic, though flour the dough a bit anyway.) Using paper as aid, turn dough into 9-inch-diameter tart pan with removable bottom; peel off paper. Seal any cracks in dough. Trim overhang to 1/2 inch. Fold overhang in, making double-thick sides. Pierce crust all over with fork.

Alternately, you can press the dough in as soon as it is processed: Press it evenly across the bottom and up the sides of the tart shell. You want to press hard enough that the pieces cling to one another, but not so hard that it loses its crumbly texture.

3. Freeze the crust for at least 30 minutes, preferably longer, before baking.

4. To fully or partially bake the crust: Center a rack in the oven and preheat the oven to 375 degrees F. Butter the shiny side of a piece of aluminum foil (or use nonstick foil) and fit the foil, buttered side down, tightly against the crust. And here is the very best part: Since you froze the crust, you can bake it without weights. Put the tart pan on a baking sheet and bake the crust for 20 to 25 minutes.

5. Carefully remove the foil. If the crust has puffed, press it down gently with the back of a spoon. Bake the crust about 10 minutes longer to fully bake it, or until it is firm and golden brown, brown being the important word: a pale crust doesn’t have a lot of flavor. (To partially bake it, only an additional 5 minutes is needed.) Transfer the pan to a rack and cool the crust to room temperature, and proceed with the rest of your recipe.

Do ahead: The dough can be wrapped and kept in the refrigerator for up to 5 days or frozen for up to 2 months. While the fully baked crust can be packed airtight and frozen for up to 2 months, the flavor will be fresher bake it directly from the freezer, already rolled out.


Filling


1 average-sized lemon (about 4 1/2 ounces; 130 grams), rinsed and dried*
1 1/2 cups (300 grams) sugar
1 stick (4 ounces or 115 grams) unsalted butter, cut into chunks
4 large eggs
2 tablespoons (14 grams) cornstarch
1/4 teaspoon table salt

Center a rack in the oven and preheat the oven 350°F (165´C). Place the tart shell on a baking sheet, which you can line with foil or parchment paper to make any spills a breeze to clean up.

Slice the lemon into thin wheels, remove any seeds, and toss the rounds — lemon flesh and peel — sugar and chunks of butter into the container of a food processor. Process, scraping down the sides of the container as needed, until the lemon is thoroughly pureed. Add the eggs, cornstarch and salt and pulse until the batter is smooth.

Pour into prepared tart shell. It will fill it completely but if due to slight variances in tart pans, egg sizes, lemon sizes or crust thickness, you have too much, do not pour it past the top of of your crust or it will become difficult to unmold later.

Bake for 35 to 40 minutes or until the filling is set. You can test this by bumping the pan a little; it should only jiggle slightly. In my oven, I find that the point at which the filling is set is also when it starts to get very light brown on top.

Let cool on rack, unmold tart pan and serve. I actually prefer this tart completely chilled, which makes it a great dessert to make in advance of a dinner or party.

* Meyer lemons are the first choice here. They’re milder with thinner skin. But if you know that you do not mind a stronger lemon and rind kick, feel free to use a regular lemon, which will have a stronger flavor and a higher proportion of skin to flesh. If your lemon is not 4 1/2 ounces (Meyers often weigh in closer to 4 ounces) go ahead and cut a wedge out of a second one to keep the lemon flavor in balance with the sweetness of the tart.

Thursday, June 14, 2012

Strawberry Muffins

I had some strawberries that weren't great looking, but I wasn't ready to throw them out. Of course, I was tempted to make my favorite strawberry summer cake recipe, but I said, no, Katherine, you will try something else. I didn't get too inventive, but I decided to use the Joy of Cooking's basic muffin recipe with a few alterations and just mix in the strawberries. So far, baking with strawberries has yielded delicious results, and Galaxy Cafe sells their strawberry muffins like hotcakes, so I figured it would be pretty yummy. I figured correctly. Warm from the oven, with a bit of salted butter, and I was a happy camper.


2 cups all purpose flour [I used 1 cup regular, 1 cup whole wheat]
1 tbsp baking powder
1/2 tsp salt
2 large eggs
1 cup milk or cream [I used fat free]
2/3 cup sugar or light brown sugar [I did 1/3 cup of each]
1/4 to 1/2 cup melted butter  (1/2 to 1 stick) or vegetable oil [I did about 1/4 cup of each]
1 tbsp vanilla [I still haven't remembered to buy more, so I didn't use any]

Preheat oven to 400 degrees F.

Whisk flour, baking powder, and salt together. In another bowl, whisk eggs, sugar, milk, and butter/oil together lightly. Mix the dry into the wet ingredients with a few strokes until moistened. Do not over mix, the batter should not be smooth [whoops, mine was]. Divide into prepared muffin cups.

Bake about 17 minutes until toothpick comes out clean. Let cool and serve warm with butter (yes, you should). 

Friday, March 23, 2012

strawberry banana breakfast cake

This is SO DELICIOUS! I'm super excited about it. I made this recipe several times before - the strawberry summer cake - and I recently made it as cupcakes for my boyfriend and I and added bananas. YES, PLEASE! They caramelized a bit on top and were so incredible that I just had to make it again as soon as we ate the cupcakes. I decided to do it as a cake because the cupcakes didn't quite have the surface area I wanted/needed and the bananas caramelized a bit onto the cupcake pan and that was not as much fun to clean up. So I just used the same strawberry cake recipe as before, wedged the strawberries in first (all over the place), and then put the bananas on top. I think we got about 10 slices of this, but I seriously could eat it all in one sitting, happily.


6 tablespoons unsalted butter, at room temperature, plus extra for pie plate
1 1/2 cups (188 grams) all-purpose flour
1 1/2 teaspoons baking powder
1/2 teaspoon table salt
1 cup (200 grams) plus 2 tablespoons (25 grams) granulated sugar
1 large egg
1/2 cup (118 ml) milk
1 teaspoon (5 ml) vanilla extract
1 pound (450 grams) strawberries, hulled and halved

Preheat oven to 350°F. Butter a 10-inch pie pan or 9-inch deep-dish pie pan (what I used). This cake would also work in a 9- or 10-inch springform or cake pan. The 10-inch would make a thinner cake than pictured.

Whisk flour, baking powder and salt together in a small bowl. In a larger bowl, beat butter and 1 cup sugar until pale and fluffy with an electric mixer, about 3 minutes. Mix in egg, milk and vanilla until just combined. Add dry mixture gradually, mixing until just smooth.

Pour into prepared pie plate. This time, I wedged the strawberries into it because the cake rises more than you'd think and this way there is fruit throughout. I laid my banana slices on top of the cake and strawberries and then the cake rose around them. Sprinkle remaining 2 tablespoons sugar over berries. [I'm not sure whether or not I think the sugar is necessary with the bananas on top - I did it for the cake but not the cupcakes and couldn't tell a difference, so why bother?]

Bake cake for 10 minutes then reduce oven temperature to 325°F and bake cake until golden brown and a tester comes out free of wet batter, about 50 minutes to 60 minutes [significantly less for cupcakes]. (Gooey strawberries on the tester are a given.) Let cool in pan on a rack.

Thursday, March 22, 2012

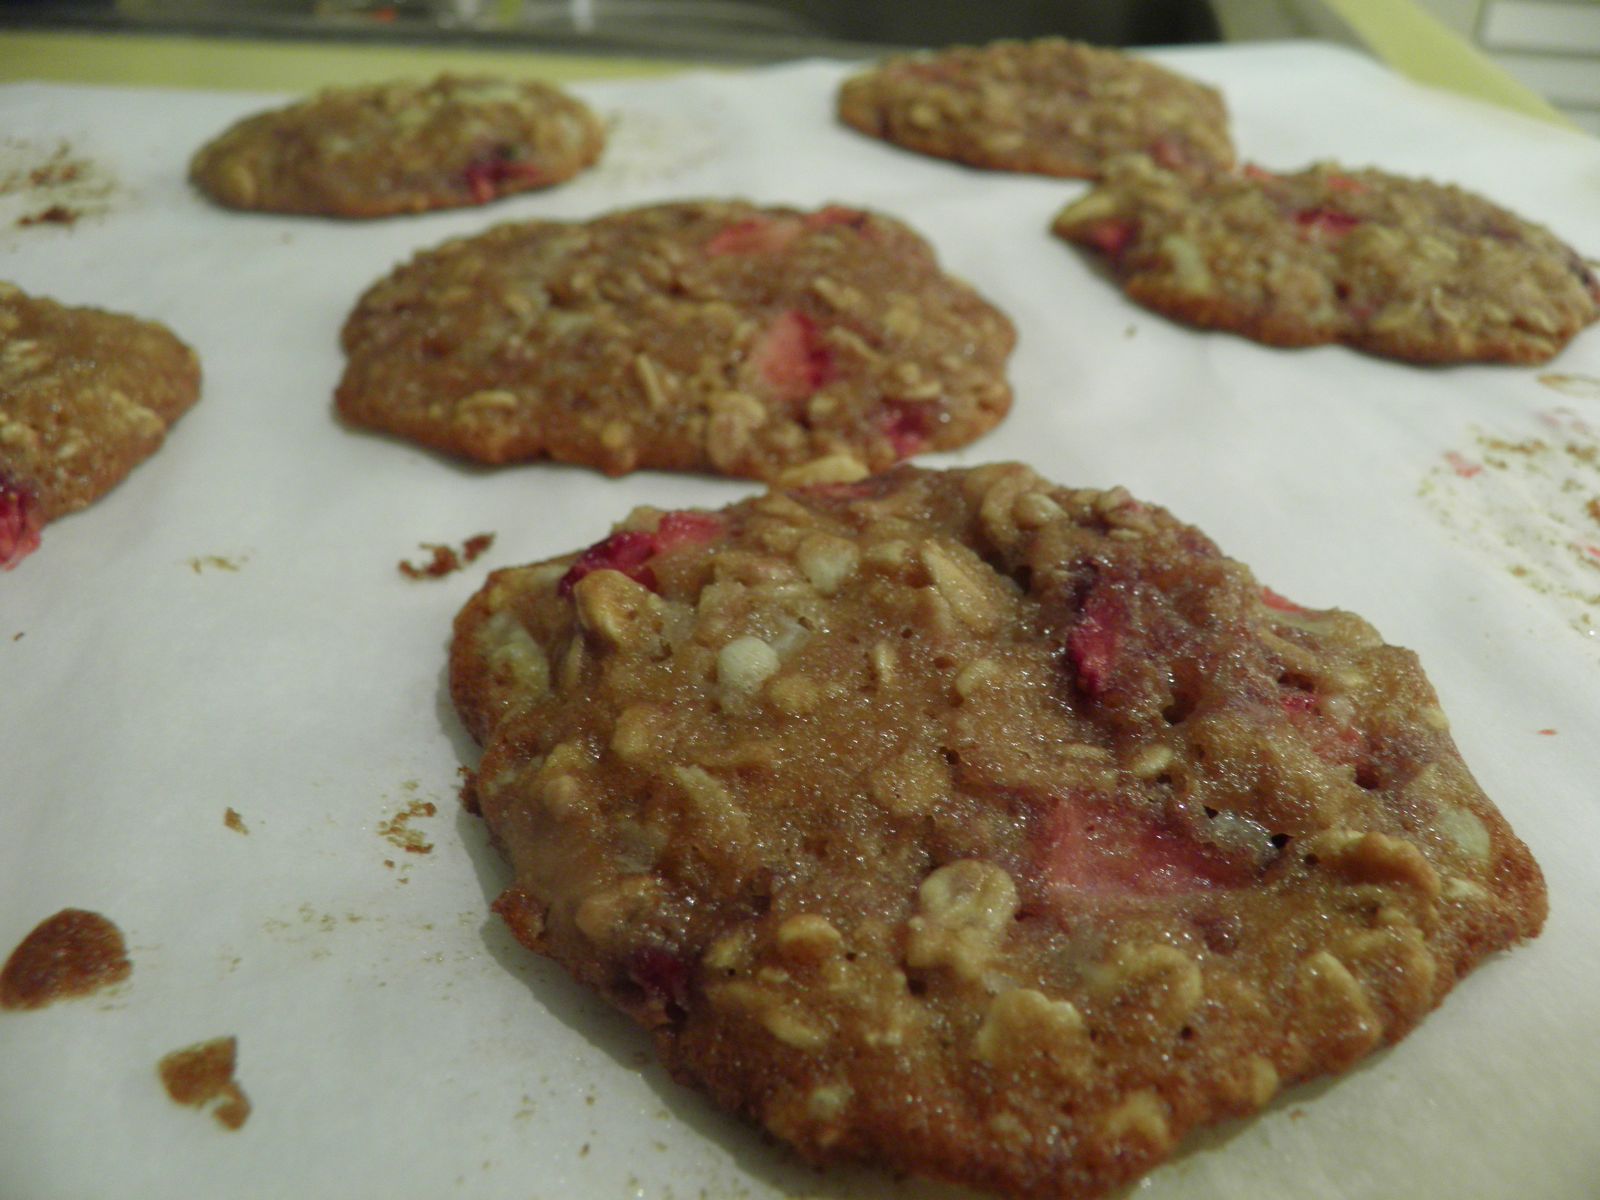
strawberry white chocolate cookies

My boyfriend found this recipe via reddit (looking at pictures of food), and we decided to give them a try. I really liked the flavors and the fact that it was a healthier cookie (the blog with the recipe claims less than 90 calories a cookie). The texture was a bit strange - never really got crispy and thinned out a bit, though the blog pictures make them look like hers were normal so I'm not sure why ours didn't turn out that way. We followed the recipe, so I can't really figure out what happened. Anyway, let me know what happens if you try them!

I did really like cooking with strawberries. The more I do it, the more I like it - my strawberry cake and these cookies and at work we have strawberry muffins that are delicious. I really like the way they sweeten as they bake and moisten the bread around them really nicely. Throw them in something and hopefully you'll like them too!


1/2 cup all purpose flour
1/4 cup whole wheat flour
1/2 teaspoon baking soda
1 cup oats (not instant)
dash of salt
3/4 cup packed dark brown sugar
2 tablespoons butter, softened
2 tablespoons unsweetened applesauce
1 teaspoon vanilla
1 egg, large
3/4 cup chopped fresh strawberries
1/3 cup white chocolate chips

In a large bowl, whisk flours, oats, salt and baking soda together. Set aside. In another bowl, beat applesauce, butter and vanilla with a handheld mixer on low speed. Add in egg and beat until full mixed.

Gradually add the flour mixture to the wet mixture and stir well. Gently fold in strawberries (so they don’t mash) and chocolate chips. Mix until fully combined. Cover the dough with plastic wrap or foil and let chill in fridge for at least 2 hours.

Once chilled, remove dough from fridge. Preheat oven to 350F and grease a baking sheet with nonstick cooking spray. Scoop about 1 tablespoon of dough onto the sheet, about 1/2 inch from each-other.

Bake for 10 – 12 minutes, or until cookies are golden brown. Chill on a wire cooling rack and then enjoy!