Thursday, December 16, 2010

chocolate cake muffins, take 2


Last time I made chocolate cake muffins, that was the intentention of the recipe, and the recipe was sort of a yogurt snack cake. This time, I used SK's everyday chocolate cake recipe that I had made before as a loaf cake and cooked it in muffin cups so that I could serve them individually more easily. I had my first boys movie night with my students (and a male teacher came too), third movie night total (and last one tomorrow), so I wanted to make it easy for them to grab. I think it turned out well, but next time I will not fill the cups as full as I did. Instead of making a half recipe, I think I will just cook it in two batches because making them individually vs. the loaf also cut the cooking time in half.


The recipe:

1/2 cup (1 stick or 4 ounces) unsalted butter, softened
1 cup (6 7/8 ounces) firmly packed light brown sugar - I used dark brown because that's what's available
1/2 cup (4 ounces) granulated sugar
1 large egg
1 cup buttermilk - I used regular whole milk
1 teaspoon vanilla extract - I only have powdered available
1 1/2 cups (6 3/4 ounces) all-purpose flour
3/4 cup (2 5/8 ounces) Dutch cocoa powder
1/4 teaspoon baking soda
1/2 teaspoon baking powder
1/4 teaspoon salt

Preheat the oven to 325°F.
In a large bowl, on the medium speed of an electric mixer, cream the butter until smooth. Add the sugars and beat until fluffy, about 3 minutes. Add the egg and beat well, then the milk and vanilla.
Sift the flour, cocoa, baking soda, baking powder and salt together right into your wet ingredients. Stir together with a spoon until well-blended but do not overmix (I actually just used the mixer again because I am lazy, and it seemed fine). Scrape down the batter in the bowl, making sure the ingredients are well blended.
I put my little muffin paper cups into my muffin tin (these were an exciting buy at the American table at the International Women's Bazaar the other weekend) and poured the batter into 12 cups. As mentioned above, mine overflowed a bit, so I think using 2/3 or 1/2 of the batter in each would work out a little better. If you make it all in one pan, it should cook for 60 - 70 minutes. I think it took mine about 35 minutes to cook in the muffin tins. Either way, just stick a toothpick in to test, and when it comes out clean, they're ready. I dusted mine with confectioner's sugar before serving.

The boys loved them and so did my roommates, and 20 minutes after they were out of the oven, all 12 were gone and I didn't eat one.


Thursday, December 2, 2010

chocolate cake muffins


Second movie night with my girls tonight, and, in addition to carrots, apples, chips, pretzels, and popcorn, I again made the thick chewy oatmeal cookies by SK (in my other move night snacks entry) and tried out another SK chocolate cake recipe for little cake muffins. The girls watched Penelope and I baked, and I think they had a good time. They are just too precious - they brought me chocolates and a traditional Bulgarian juice drink (er, not too delicious).


Chocolate Cake Muffins:

As far as the recipe, I had a few different ingredients, but I think it turned out pretty much as expected. I also accidentally added all the oil with the chocolate and then later realized it only was supposed to be half, but it didn't seem to be a major crisis. I made 12 little mini muffins and 12 regular muffins.


7 ounces (200 grams) bittersweet or semisweet chocolate, coarsely chopped
1/2 cup (125 ml) vegetable oil
1/2 cup (125 ml) plain, whole-milk yogurt (I didn't have whole milk yogurt, it seemed fine)
1 cup (200 grams) sugar
3 large eggs, at room temperature
1 teaspoon vanilla extract (I used a vanilla sugar because we don't have extract here)
1/2 teaspoon almond extract (we don't have this so I didn't use any)
1 1/2 cups (200 grams) flour
1 1/2 teaspoons baking powder
1/2 teaspoon coarse salt (I used regular salt)

1. Preheat the oven to 350°F. Line a 12-cup muffin tin with paper cupcake liners or lightly butter the pan (um, I rubbed it in oil and it sort of worked).

2. In a heatproof bowl set over simmering water, melt the chocolate with 1/4 cup of the oil. Once melted and smooth, remove from the heat (I did this in the microwave on high for a few seconds on and off, and stirred in between).

3. In another bowl, mix the remaining 1/4 cup oil with yogurt, sugar, eggs and vanilla and almond extracts.

4. In a large bowl, whisk the flour, baking powder, and salt. Make a well in the center of the flour mixture and pour in the yogurt mixture. Stir lightly a couple times, then add the melted chocolate and stir until just smooth.

5. Divide the batter among the muffin or springform cups and bake for 20 to 25 minutes (less for mini-springforms, more for muffins, though your oven may vary) or until they feel barely set in the middle and a tester or toothpick comes out clean.

6. Remove from the oven and cool. I dusted mine with powdered sugar before serving.


Wednesday, December 1, 2010

chocolate cake, oatmeal raisin cookies


Nothing like having grading to do to make me catch up on blog posts... So I decided to have my students over to my house for movie nights over the course of 4 sessions so that my 36 students were broken down into reasonably sized groups (and by sex, no hanky-panky in my house thank you). I realized afterward that this is actually a quasi educational event since the movies are in English, with the bonus challenge of no subtitles because we can't find the remote for our dvd player. Anyway, I just thought it would be a nice thing to do, especially for the handful of students who are away from home (and can you imagine, at the age of 13/14?!), to make them feel special and liked. I also wanted an excuse to make them some treats. So I had the first group of girls over a couple weeks ago, and I had chips, popcorn, carrots, apples, pretzels from the store and made SK's thick chewy oatmeal cookies and SK's everyday chocolate cake. The girls really enjoyed it and were really cute about it. My roommates were impressed, I think, at how adorable and quiet they are. The girls in my class are all just incredibly sweet. I love the boys too, but they are a bit of a different animal. I am slightly nervous about those nights, but I asked Rob, one of the other ESL teachers, to chaperone it with me, and having an adult male influence is definitely easing my mind a bit about handling them. Anyway, all my students are wonderful and I really enjoy them.

Speaking of the cookies and cake, I made a couple mistakes. First, I was talking to my stepdad on skype while making the cookies and miscalculated the conversion from English to metric for grams for butter and so they had half the butter that the recipe called for. I noticed that they were a bit off but I couldn't figure out what I did wrong until well after the first batch was in the oven. They weren't as delicious as they had been in the past, but I was still pleased with them. The cake is sort of a long process, largely because of the baking time (compared to movie length) of 45-60 minutes, and so I didn't really let it cool because I wanted to serve it right when the movie ended and then get the girls home (it was only 6 pm but I didn't want it to be a long event). It sort of fell apart, which led to me dumping piles of chocolately crumbs on my girls' napkins. At the end of the day, it worked out because it got them all laughing at me and I think they enjoyed seeing me being silly in my domestic environment (vs. frequently seeing me being silly at work). I am having another movie night tomorrow with the second girls group, and I picked out a different recipe to use to make little chocolate cake muffins. My fingers are crossed and my camera is ready.

Chocolate Cake:

1/2 cup (1 stick or 4 ounces) unsalted butter, softened
1 cup (6 7/8 ounces) firmly packed light brown sugar
1/2 cup (4 ounces) granulated sugar
1 large egg, at room temperature
1 cup buttermilk
1 teaspoon vanilla extract
1 1/2 cups (6 3/4 ounces) all-purpose flour
3/4 cup (2 5/8 ounces) Dutch cocoa powder
1/4 teaspoon baking soda
1/2 teaspoon baking powder
1/4 teaspoon salt

Preheat the oven to 325°F. Butter and lightly flour a 9×5x3-inch loaf pan, or spray it with a butter-flour spray. In a large bowl, on the medium speed of an electric mixer, cream the butter until smooth. Add the sugars and beat until fluffy, about 3 minutes. Add the egg and beat well, then the buttermilk and vanilla. Don’t worry if the batter looks a little uneven. Sift the flour, cocoa, baking soda, baking powder and salt together right into your wet ingredients. Stir together with a spoon until well-blended but do not overmix. Scrape down the batter in the bowl, making sure the ingredients are well blended.

Pour the batter into the prepared loaf pan. Bake for 60 to 70 minutes, or until a cake tester inserted into the center of the loaf comes out clean. Cool in pan on a rack for about 10 to 15 minutes, at which point you can cool it the rest of the way out of the pan.


Oatmeal Raisin Cookies:

1/2 cup (1 stick or 4 ounces) butter, softened
2/3 cup light brown sugar, packed
1 egg
1/2 teaspoon vanilla extract
3/4 cup all-purpose flour
1/2 teaspoon baking soda
1/2 teaspoon ground cinnamon
1/4 teaspoon salt (I often use a half teaspoon, but I like more salt in my baked goods)
1 1/2 cups rolled oats
3/4 cup raisins
1/2 cup walnuts, chopped (optional)

Preheat oven to 350°F (175°C).

In a large bowl, cream together the butter, brown sugar, egg and vanilla until smooth. In a separate bowl, whisk the flour, baking soda, cinnamon and salt together. Stir this into the butter/sugar mixture. Stir in the oats, raisins and walnuts, if using them.

At this point you can either chill the dough for a bit in the fridge and then scoop it, or scoop the cookies onto a sheet and then chill the whole tray before baking them. You could also bake them right away, if you’re impatient, but I do find that they end up slighly less thick.

The cookies should be two inches apart on a parchment-lined baking sheet. Bake them for 10 to 12 minutes (your baking time will vary, depending on your oven and how cold the cookies were going in), taking them out when golden at the edges but still a little undercooked-looking on top. Let them sit on the hot baking sheet for five minutes before transferring them to a rack to cool.

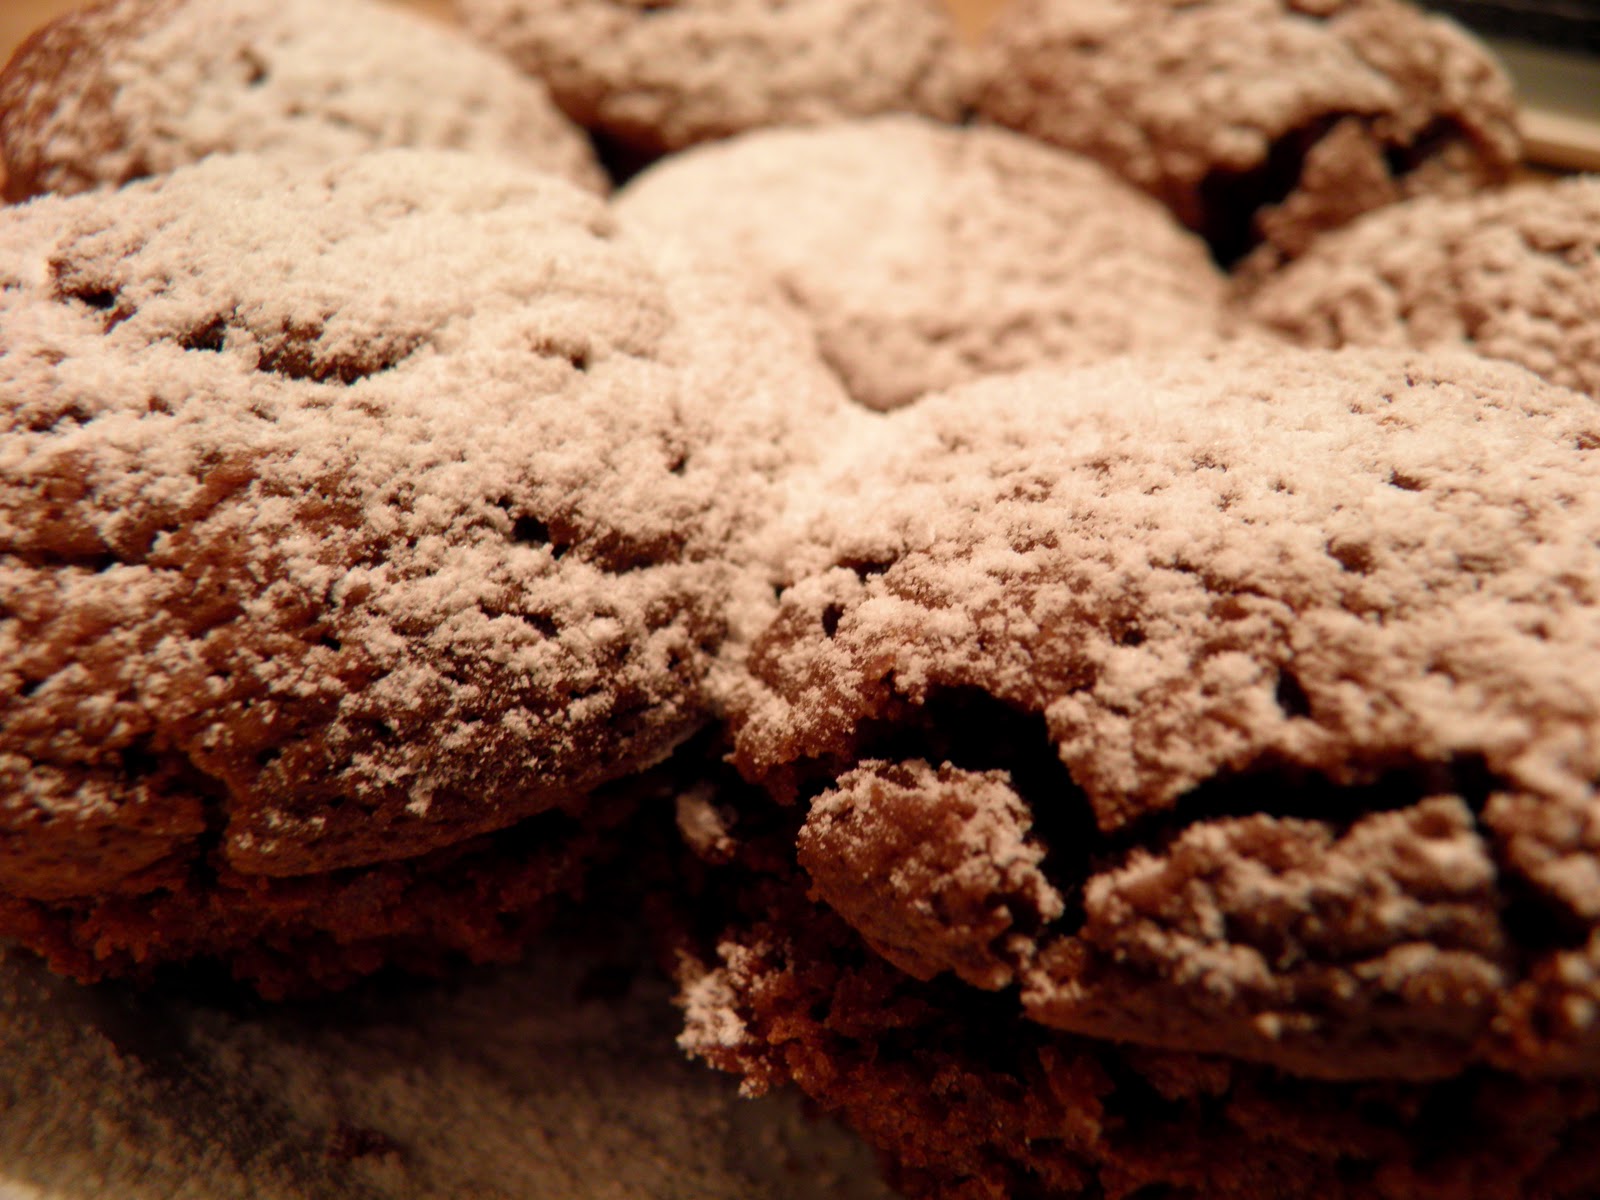
Pictures of my not-quite-right recipe :)

I have made the recipe quite a few times, so some pictures from more successful and correctly done experiences.


lemon ricotta pancakes


A few Mondays ago for my weekly dinner, I made SK's lemon ricotta pancakes with sauteed apples along with scrambled eggs and cyrene cheese. My roommates liked the pancakes; I found them too different of a texture from normal pancakes to really wrap my brain around them. They are light and fluffy from the whipped egg whites, and the resulting texture is a foamy batter. The taste is also a little different, unsurprisingly, due to the ricotta cheese and lemon zest. All in all, they were good, but I think I will stick to more traditional pancakes. What can I say, my dad made great breakfast food and it's hard for me to break my strong associations with his dishes. The sauteed apples were delicious, though, and I would definitely make them again to go with ice cream or other pancakes or anything you might want to eat sauteed apples with. We kept leftover apples in the fridge and continued to eat them for a couple days.


For the sauteed apples
4 large Granny Smith apples, peeled, cored, and sliced - this is a surprising amount of apples, use a large pan
2 tablespoons unsalted butter
3 tablespoons sugar
1/2 teaspoon cinnamon - I added more because I really like a solid cinnamon flavor to my apples
fresh lemon juice to taste

For the pancakes
4 large eggs, separated
1 1/3 cups ricotta
1 1/2 tablespoons sugar
1 1/2 tablespoons freshly grated lemon zest
1/2 cup all-purpose flour
Melted butter for brushing the griddle

Maple syrup, as an accompaniment - I didn't have any because it isn't available here, but I think it would have been quite delicious, so I recommend it.

Prepare the sauteed apples:
In a large heavy skillet, saute the apples in the butter over moderately high heat, stirring occasionally, for 5 minutes, or until they are softened, sprinkle them with the sugar and the cinnamon, and cook them over moderate heat, stirring occasionally, for 5 to 10 minutes, or until they are tender. My apples took significantly longer to cook, so I alternated having a lid over the middle and stirring them around to get them more moist and tender. Stir in the lemon juice and keep the mixture warm.

Make the pancakes:
In a bowl whisk together the egg yolks, the ricotta, the sugar, and the zest, add the flour, and stir the mixture until it is just combined. In a bowl with an electric mixer, beat the egg whites with a pinch of salt until they hold stiff peaks, whisk about one fourth of them into the ricotta mixture, and fold in the remaining whites gently but thoroughly. Heat a griddle over moderately high heat (Deb firmly believes that pancakes should be cooked medium-low) until it is hot enough to make drops of water scatter over its surface and brush it with some of the melted butter. Working in batches, pour the batter onto the griddle by 1/4-cup measures and cook the pancakes for 1 to 2 minutes on each side, or until they are golden, brushing the griddle with some of the melted butter as necessary. Keep them warm in a preheated oven.

Tuesday, November 30, 2010

noodles with peanut sauce


So I am a big back logged on the recipes I have made recently, but in an effort to catch up, I will go out of order and just post the one I made last night for my Monday dinner. Of course, recipe from SK and it turned out delicious. I was sort of nervous because I haven't really cooked Asian cuisine in any way before, and of course getting the ingredients in Bulgarian is a bit of a toss-up, but it all turned out well. I don't know if I got the exact right noodles, but they looked similar and were in the Asian section (very small that it is) and they tasted good. It was a cold dish which I don't normally like with pasta, but it was quite tasty. I added broccoli and mushrooms and less peppers because I prefer those vegetables.


For peanut dressing
1/2 cup smooth peanut butter
1/4 cup soy sauce
1/3 cup warm water
1 tablespoon chopped peeled fresh ginger
1 medium garlic clove, chopped
2 tablespoons rice vinegar
1 1/2 tablespoons Asian toasted sesame oil
1 tablespoon honey
1 teaspoon dried hot red pepper flakes or a splash of the hot sauce or chili paste of your choice

For noodles
3/4 lb dried soba nooodles (dried linguine fini or spaghetti will work in a pinch)
4 scallions, thinly sliced
1 red bell pepper, cut into 1/8-inch-thick strips
1 head of broccoli, cut up and steamed
4 mushrooms, cut up into slices
Half a seedless cucumber, thinly sliced
1 cup tofu, cut up

I put the dressing ingredients in a bowl and then used the immersion blender until smooth, about 2 minutes.

Cook pasta in a 6- to 8-quart pot of boiling salted water until tender. Drain in a colander, then rinse well under cold water. Whatever pasta I made cooked really quickly, so if it is the soba noodles or whatever, I would advise having everything ready before putting them in.

Add pasta, scallions, bell peppers, broccoli, mushrooms, cucumber and tofu to dressing, tossing to combine. Serve immediately.

Monday, November 15, 2010

parmesan cauliflower quiche cake


This is the recipe I made for last Monday night's dinner. Of course, it was from SK and tasted pretty darn good. It was definitely different from anything I have had or made before, but it turned out pretty well. She calls it a cake, I call it a quiche cake because it does have a lot of egg and this way people sort of know what the are getting themselves into. The texture is different, but once you adjust your expectations for it, I think it's pretty good. My roommates liked it too, and I ate it for lunch the next two days.
One of my roommates, ready for dinner:


parmesan cauliflower quiche cake


1 medium cauliflower (1 1/2 pounds, 23 to 24 ounces or 650 to 700grams)
1 large red onion, peeled (I used white because we didn't have red)
5 tablespoons olive oil
1/2 teaspoon finely chopped rosemary
10 medium or 8 large eggs
Handful (3/4 ounce or 20 grams) basil, chopped
Scant 1 1/2 cups (180 grams or 6.3 ounces) all-purpose flour
2 1/2 teaspoons baking powder
1/2 teaspoon ground turmeric
2 cups finely grated parmesan cheese (200 grams or 7 3/4 ounces - I used 150 grams) or about 1 generous cup of grated Romano cheese
Salt and black pepper
Butter, for greasing pan
2 tablespoons black sesame seeds (I used white)

Preheat oven to 350°F (180°C) degrees. Break cauliflower into medium florets (this will cause less mess than chopping it). Place floret in a pot with a teaspoon of salt, cover them with water and simmer for 15 to 20 minutes, until quite soft. (I think it took mine longer than that, so worry less about the time and more about getting them soft). Strain and let drip in the colander for a few minutes so they dry and cool.

Meanwhile, prepare the batter (I actually started on this while my cauliflower was cooking once it was longer than 15 minutes). Halve your red onion and cut a few thin rings off the end of one side; set them aside. Coarsely chop the remainder of your onion. Heat all of your olive oil in a saucepan and saute the chopped red onion and rosemary together until soft, about 8 minutes. Remove from heat and allow to cool.

Whisk eggs and olive oil and onion mixture together. Stir in basil. Whisk flour, baking powder, turmeric, cheese, 1 1/2 teaspoons salt (use 1 teaspoon if you are nervous about this amount) and many, many grinds of black pepper together in a separate bowl and add to egg mixture, whisking to remove lumps. Stir in cauliflower gently, so most pieces remain intact.

Line the bottom of a 9-inch (24cm) round springform pan with parchment paper. Butter the sides generously. Put the sesame seeds in the pan and toss them around so that they stick to the sides. Pour in the cauliflower batter, arrange the reserved onion rings on top and bake cake in the center of the oven for 45 minutes, until golden brown and set.

Serve warm or at room temperature. Before you serve the cake, be sure to run a knife around the pan.


Okay, this is just my salad - but it was yummy! Spinach, cyrene (like feta), tomatoes, sesame seeds, and homemade balsamic vinaigrette (balsamic, olive oil, salt, pepper, onion, garlic)

Sunday, November 7, 2010

vegetable soup, cheddar apple scones

I haven't been cooking, really, lately because of my trip to Athens last weekend. The week leading up to the trip, I made my Italian host mom's vegetable soup for my Monday night dinner and then cleared out my fridge and pantry so nothing would go back while I was out of town (only for 3 days, but I don't really stock up on much). We got back plenty early on Monday for me to go to the grocery store, but I decided to be lazy and lounge around the house instead. I made Pia's tomato sauce, always simple and delicious, and SK's pizza dough with the alteration of 1/2 cup of wheat flour instead of the 1/2 cup of white flour. I then spent the rest of the week eating peanut butter on rice cakes for breakfast, lunch in the cafeteria, and my roommate's meals for dinner. Thus, it wasn't until Saturday that I made it to the HIT and got groceries (after a delicious stop at the bagel place for bagel sandwiches, oh America, and 12 dozen frozen bagels to go!). I picked out a recipe to cook for dinner tomorrow, which I will post about once it's done, and the cheddar apple scone recipe. It was fun to sort through SK's recent recipes and pick out which ones I want to make. Autumn is a wonderful time to cook.

***

Briefly, Pia's vegetable soup. It is so simple, healthy, and delicious; I love having it as an anytime option. Essentially, you chop up whatever vegetables you want to use, throw them in a pot, pour in a can of diced tomatoes or paste, cover with water (an inch over the top, ignore the floaters), add a couple tablespoons of olive oil and boil. Once the vegetables are all soft, use an immersion blender to puree everything into a smooth soup. Season to taste - I found that it makes a lot of soup and I need a lot of salt to get the flavors to be evident, but I just kept sprinkling and adding until I got there. Add a handful (about 1/4-1/2 cup) of small pasta per person and bring back to a boil for as long as it takes to cook the pasta in the soup. When the pasta is cooked, serve! I like it because it uses potatoes and tomato paste as a base and then you can add in whatever vegetables are around and that you like. It tastes really healthy but still yummy, and was a hit with my roommates. It also made quite a bit of soup, so even after seconds, I had it for lunch for the next four days.


recipe, as I made it on Monday - I starred the items that I added to her basic recipe

2 cups peas
2 medium onions
3 potatoes
3 carrots
1 stick of celery (I didn't include this)
*1 lb chunks of pumpkin
*1 head broccoli, cut into florets
3 tbsp olive oil
salt
water (enough to cover and a little above vegetables)
½ cup tomato paste (I used canned diced tomatoes because it was available)


Pia's instructions (translated):

if water goes down, add hot water while cooking
cook/boil for 30 minutes (until soft)
mix with electric mixer
when its mixed and boiling again, add handful of small-type pasta for each person,
cook until ready

***


Now, onto the cheddar apple scones from SK

I followed her recipe except that I used whole milk instead of heavy cream, because I have yet to find heavy cream here (or maybe I just don't know where to look and how to translate it) and I just used some regular cheddar instead of sharp cheddar because our non-cyrene/kashkaval options are pretty limited. I also was terribly disappointed in myself for my first batch - I don't know what all the symbols on our oven mean, and I must have been on the wrong one because it burned the outsides of the first scones (not terribly but enough to be brown and make me sad) even though they hadn't even cooked the full 30 minutes. I kept a close eye on the second batch and they turned out fine, so that was a relief. And they were quite delicious. 


2 firm tart apples (1 pound or 2 454 grams)
1 1/2 cups (6.75 ounces or 195 grams) all-purpose flour
1/4 cup sugar plus 1 1/2 tablespoons for sprinkling (total of 2.2 ounces or 63 grams)
1/2 tablespoon (7 grams) baking powder
1/2 teaspoon salt (3 grams) plus additional for egg wash
6 tablespoons (3 ounces or 85 grams)unsalted butter, chilled and cut into 1/2-inch cubes plus additional for baking sheet if not lining it with parchment
1/2 cup (2.25 ounces or 65 grams) sharp cheddar, shredded (white is recommended, I assume for aesthetics)
1/4 cup (2 ounces) heavy cream
2 large eggs

Preheat oven to 375 degrees. Peel and core apples, and then cut each into 16ths. Line a baking sheet with parchment, place the apples on, and bake them for 20 minutes. SK says until dry, but mine were pretty juicy - I am not sure if I should have let them go longer or if it was because I used a different type of apple, but they were fine anyway. Set aside to cool.

Sift and whisk flour, sugar, baking powder and salt together. 

In a separate bowl, mix cubed butter, 1 egg, grated cheddar, heavy cream, and apple chunks. I couldn't tell from her instructions exactly the order for all of this, so I put them all in a bowl and mixed them together with a wooden spoon. Then I poured in half the dry ingredients, mixed it a bit, poured in the rest of the dry mix, and mixed it until it came together. It started out really dry, but after some patient mixing, ended up being a sticky wet dough. In my experience, that is pretty standard for scones.

Roll the dough out into a thick circle and cut into 6 (I made 8) triangles. Mix second egg with some salt and brush on top of scones. Sprinkle with sugar. 

Bake on either a parchment lined or buttered baking sheet for about 30 minutes. Keep an eye on them, you don't want yours to burn like mine did. Enjoy!


Sunday, October 24, 2010

mmm bread


so i've been wanting to make bread lately, but i'm too lazy to go get yeast and then worry about whether or not the yeast is bad if my bread doesn't come out as expected. enter: irish brown bread. apparently the authentic version of irish soda bread, this bread doesn't involve yeast, only requires fifteen minutes to throw together (including pulling ingredients off shelves), and is full of whole wheat goodness. the recipe i used comes from the lovely blog kiss my spatula, and can be found here. it was a good recipe for my first attempt at bread. it came out a little on the crumbly side, but still had great flavor and was very easy (and not time consuming) to make.

my version:

preheat oven to 350.

3 1/2 cups whole wheat flour
2 tsp salt
1 tsp baking powder
1 tsp baking soda
4 tbsp cold unsalted butter, cut into small cubes
1/2 cup old fashioned oats
1 1/3 cups whole milk
1/3 cup apple-cider vinegar

put the milk and apple cider vinegar together in a bowl and let sit for 10-15 min, until the milk is thickened [you can also use storebought buttermilk. i used low-fat milk and it came out just fine]. mix the flour, salt, baking powder, and baking soda together in a large bowl. cut in the butter with a pastry cutter or two forks until the mixture resembles coarse meal. stir in oats [the recipe called for finely ground oats, but i only had regular quaker oats. if i had to do it again i'd buy the finely ground oats because i think the size of the oats might have made the bread more crumbly when baked]. pour in the thickened milk and mix until the dough just sticks together. knead the dough 4-5 times on a lightly floured surface. shape the dough gently into a round loaf, roughly 6in in diameter. place on a baking sheet covered in parchment paper, and cut an x into the top of the loaf with a sharp knife. bake, rotating halfway through, until the top is golden brown and a tester inserted in the middle comes out clean, approximately 45-60 min.

a few more tips:
  • don't use salted butter. i cut out a half tsp of salt from the recipe, and even using unsalted butter i found the bread a bit salty. (and i like salt.)
  • the bread cooked much faster in my oven than the 1 hour stated in the recipe, make sure to monitor your bread starting at 40 min into baking.
it's a very hearty bread, very delicious, and extremely easy to throw together. i'll be making this again soon, and hopefully will be able to correct the crumblyness of the bread.