Thursday, September 29, 2011

chocolate cupcakes with whipped cream cheese frosting

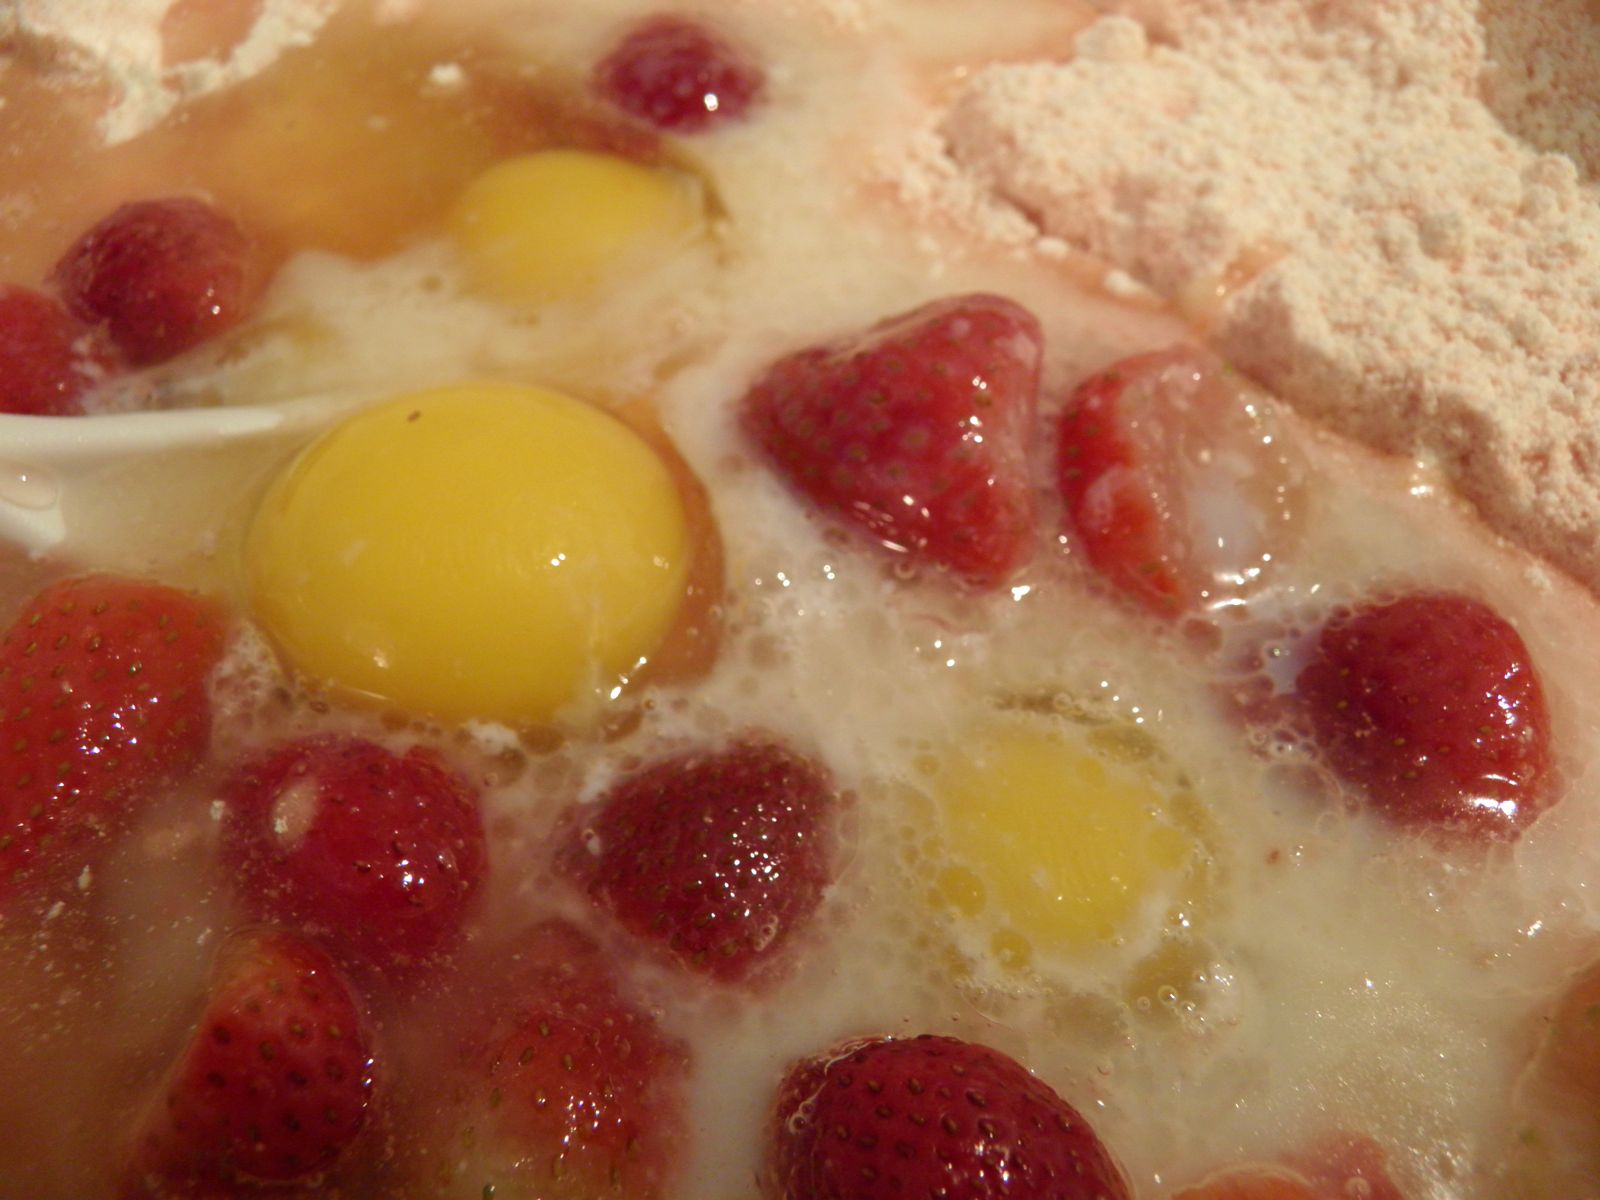
Yesterday I made my sister's strawberry birthday cake, and because I only made one cake (vs. two layers), I ended up having about 1/4 of the whipped cream cheese frosting over. My friend's birthday is tomorrow but we are going out two steppin tonight (!!!!love it), so I thought I would make her some birthday cupcakes. I decided to use the leftover icing, make the rest of the whipping cream into whipped cream, mix the two together to make more and lighter icing, and then make chocolate cupcakes. I also bought a decorating kit, and by kit I mean a set of icing bags and three tips. Nonetheless, decorating the cakes was the highlight of my day... so far. Until I go dancing! Anyway, I used a recipe from my Barefoot Contessa at Home cookbook for chocolate cake. I was a little surprised at how they rose a bit and the spread out all over the tin, causing me to just cut them out so that they would be normal cupcake shapes. Then again, Ina made the recipe as cakes, so maybe that has something to do with it. Regardless, it worked out all right and is pretty tasty.
 I learned from one of my roommates to put the batter in a big measuring cup so that you can neatly pour it into the cupcake pan. Genius!


 Woot! First attempts at decorative icing. 


I made a half recipe so that it would yield less cupcakes - I ended up with about 11, but I think it would be better if I had divided it into 12. Below is the full recipe, which makes 2 8-inch layers.

1 3/4 cups all purpose flour
2 cups sugar
3/4 cup cocoa powder
2 tsp baking soda
1 tsp baking powder
1 tsp salt
1 cup buttermilk
1/2 cup vegetable oil
2 large eggs, room temperature
1 tsp vanilla extract
1 cup freshly brewed coffee

Preheat oven to 350 degrees. I sprayed my pans with Pam baking spray, but truly I'm sad that I forgot to use my really cute polka dot cupcake papers.

Sift flour, sugar, cocoa, baking soda, baking powder, and salt into bowl and mix.

In another bowl, mix buttermilk, oil, eggs, and vanilla.

On low speed of electric mixer, pour wet ingredients into dry ingredients. Mix until combined. Then add coffee and stir just until combined.

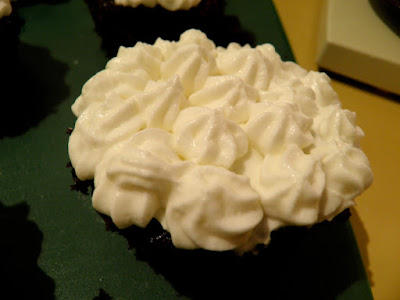
Pour into pans and bake for 35-40 minutes. Let cool for 30 minutes on rack. To ice, it may be easier to put them in the fridge or freezer for a while first to firm them up. I've learned that for icing, using thin metal surfaces work best for crumb-free spreading. I used my icing bag and flower tip (I'm making up names since they weren't labeled) and attempted some decorating skills on the cupcakes. 

Davis strawberry cake

My little sister is turning 22 today! How did we get so old? I mean, I recognize that we are not old, but we both are officially adults, and it is strange. For her birthday, she requested that I make this cake that her best friend's mom made them in high school. So the mom sent it to her and she passed it along to me. It isn't the kind of thing I would normally make since it uses cake mix as an ingredient and I prefer to make everything from scratch, but it is for the birthday girl. I looked up a whipped cream cheese frosting recipe from allrecipes. She also requested that it not be done as cupcakes, which we all know is how I like to do things, so again, birthday girl got her way. It was a pretty tasty cake, I will say. I'm still not totally sold on using mixes vs. homemade (it wasn't really that many less steps not to add my own baking powder, salt, flour, etc), but it did taste good. I didn't even get a bite of one of the strawberry chunks, so I'm curious how that played out.


Happy Birthday boo! I love you! I'm so glad we live in the same city again and can hang out (even if it is a crazy, last-minute trip to go schlep your babysitting kids around together)


Strawberry Cake

1 (18.25 ounce) package white cake mix
1 (3 ounce) package strawberry flavored gelatin
2/3 cup vegetable oil
4 eggs
3 tablespoons all-purpose flour
4 ounces frozen strawberries
1/2 cup buttermilk
Directions

Thaw and drain the frozen strawberries.
Preheat oven to 350 degrees F (175 degrees C). Lightly grease on 9x13 inch cake pan.
Combine the white cake mix, strawberry gelatin, oil, eggs, flour, thawed strawberries, and buttermilk and mix until just combined. Pour batter into prepared pan.
Bake at 350 degrees F (175 degrees C) for about 25 to 35 minutes or until a toothpick inserted in the center comes out clean.

Frosting

1 (8 ounce) package cream cheese, softened [I used the 1/3 less fat version]
1 cup white sugar
1/8 teaspoon salt
1 teaspoon vanilla extract
1 1/2 cups heavy cream

In a large bowl, beat cream cheese, sugar salt and vanilla until smooth. In a small bowl, whip the heavy cream until stiff peaks form. Fold into the cream cheese mixture.

*To ice the cake, I put it in the fridge for about 20 minutes to help firm it up. I have heard and experienced that a colder cake takes icing better, so I try to budget that into my schedule.
**I also had a good amount of icing left over that I didn't use, but had I baked the cake in two layers as I had planned on doing, the remaining would have been needed to ice between the layers.

Nutritional information (for 1/14 of cake only)
269 calories
13g total fat
34g carbs
4g protein

Nutritional information (for 1/14 of frosting only)
207 calories
15g total fat
17g carbs
1g protein

Monday, September 26, 2011

austin foods

I know I have been terribly MIA lately. I haven't really made many new recipes lately and have been trying to take advantage of some of the great food out and about in Austin. I don't think I have written down every restaurant I've been to, but several are definitely worth mentioning. I probably forgot a few, but here are several that I have sampled lately. In order of fanciness of establishment (obviously a very technical classification), but not necessarily flavor:

Barley Swine
My mom's best friend recommended this, so we went for my 25th birthday (exactly!) a month ago. Our waitress told us that the judges from Top Chef had been in the week before and she got to wait on them. The food was so incredibly delicious. We ordered 7 dishes for the 4 of us and every one was really, really good. I definitely recommend it.

Texas French Bread
My mom gave me a book about local restaurants and stores in Austin (eat.shop Austin), and this restaurant was one of the ones listed. Ebe took me out for my birthday and we had a really good meal. We got some ravioli, black drum fish, salad, and some wine that we brought from the next door quick mart.

Dart Bowl Steakhouse
Another restaurant in the book was the Dart Bowl Steakhouse, which theoretically was a restaurant that had really good steak and enchiladas but also had a bowling alley. So I used it as a first date, which thankfully was with someone who has a good sense of humor. Why? Because when we pulled up, it was definitely a bowling alley. We walked through the slightly disheveled main area and past the lanes to the cafe. Luckily, it was separate from the bowling alley area and so it seemed more like a restaurant. Sort of. Anyway, the food was fine, not great, but the date was fun and then we were already somewhere to bowl, so that worked.

Now for some low key places:

Torchy's Tacos
One of our friends works here, so we went the other day to try it out. Man, these were some delicious, filling tacos. I had the taco of the month, a pulled pork taco with sour cream, cheese, pickles, avocado, and bbq sauce. It was very good. They also have tricks like getting a tortilla "trailer park," meaning that it had queso on it.

Man Bites Dog
Note: I actually mistyped God, ahaha. We went here last night for dinner and it was really delicious. I got a lamb dog with tzatziki sauce, cucumbers, tomatoes, feta cheese, and a really soft, fluffy bun. I liked it, but I really liked the boys' beef dogs. On the hair of the dog, the beef dog wrapped in bacon, deep-fried with chili, and then covered with cheddar cheese, chili, a fried egg, and tabasco. It was a little spicy for me, but I liked it a lot. I am starting to appreciate fried eggs on a lot of different foods.

P. Terry's
This is a fast food burger place with really delicious, affordable burgers. Yum! And they are everywhere in Austin, or at least where I drive a lot

Wednesday, September 7, 2011

spices

I'm not sure whether or not I mentioned this before when I talked about how I stocked my new kitchen, but I thought I would go ahead and write a quick post about my spices. My mom's friend told my mom who told me about getting spices in bulk from stores like HEB. Luckily for me, HEB is the grocery store a few blocks from my house. So I went the bulk section when I first moved in and just beyond the granola and dried fruits and nuts and all that were spices. They had about 30 jars of various spices that you could scoop into little baggies. The first time I just got a few basics and the next couple times I went back to the grocery store (I try to go once a week and get what I want to cook that week), I kept adding spices as I thought of them or saw them in a recipe I wanted to try.

Here's the greatest part about it: I paid about $4 total for all the spice baggies, if that. My guess is probably a lot less since most of them came up, after being weighed, as like 5 cents or 10 cents or something. A few of the more expensive ones were about 70 cents. But really, it was amazing considering the a few aisles over the spices sell for like $4 each in the glass containers. And how often do we completely use one of those? This way, I can just get it as I need it and still pay less. My mom even had the idea (I don't know if she actually did it yet) of cleaning out some of her spice containers, getting spices in baggies, and storing the spices in the old labeled jars. For now, for me, I just have labeled baggies in a bag in my pantry, but hopefully I will figure out a nicer way of doing it. Maybe I could get some of those like 7-day medicine containers (you know, for people who take a drug cocktail everyday, it has little boxes for each day) and label those and it would be a small, scoopable container. Noted.


spice (and blueberry) scones

So I already posted this recipe a while ago, but I haven't made it at all in America, so it is sort of like making it for the first time again. I did half the recipe that I put into the BLBC cookbook, which yielded 6 scones and is what I will post below. I also put some blueberries in three of the scones, to see how I liked the flavor combination with the spices. I also put sea salt on two of the scones, one blueberry and one regular, because I have been noticing the use of salt to enhance the flavor of sweets. I also sprinkled some cardamon and cinnamon on top of two of the scones to see how I liked that. I can see how the sea salt works, but I wasn't won over with its application here. I liked the spices on top, though. I'm not really sure how to go about making up my own recipes, but I'm trying to start small with little tweaks (like slightly changing the amounts of butter or sugar and seeing if the effect is noticeable or bad, or substituting lowfat yogurt, etc).


1.5 cups flour
1 tsp baking powder
1/4 tsp baking soda
1/4 tsp salt
1/2 tsp ground cardamon (or cinnamon, I did a combo of both)
dash nutmeg
1/4 cup sugar
1/2 egg (I lightly beat one egg and poured in half of that)
1/2 cup yogurt (I used lowfat natural plain)
3 tbsp butter (it calls for half a stick)

Preheat oven to 375 degrees F. Mix dry ingredients together first. Add butter, cubed into small pieces. Add egg, yogurt, sugar, and candied ginger (if you want, or blueberries). Mix together until thick dough forms (this may take a while and require the use of your hands and then subsequent licking of your fingers). Grease cookie sheet (or put down parchment paper) and put scones on as balls or cut into triangles. Cook in oven for around 25 minutes until light golden brown.

Nutritional information (for 1 of 6 scones, no blueberries/add-ins)
209 calories
6.4 g total fat
34.1 mg cholesterol
31.3 g carbs
4.6 g protein

Thursday, September 1, 2011

sauteed tilapia with salsa

I have been wanting to use my new hand blender and all its accessories, so the other day I made some homemade salsa. It wasn't terribly exciting, I just threw some tomato, onion, cilantro, line juice, and salt into the chopper and let it do the work. It made it pretty small, so its was more pureed than most salsa. I think if I wanted it chunkier, I would need to do less pieces at a time and mix it up separately. But it did taste pretty good, though pretty simple for those of you that like more jazzy flavors. You could add mango or jalepeno or whatever else tickles your fancy.

Tonight I invited my sister over for dinner, and as she is a pescatarian, I decided to get some tilapia. My dad makes it pretty often considering that both his girlfriend and my sister only eat fish, and it is really easy to cook tilapia, in addition to it being pretty inexpensive. I went to Central Market to get some on my way home today and it was $7.99/lb and for one filet it was only about $3. I also made some zucchini fritters (posted earlier) to go with the fish and then lemon glaze muffins for dessert.


I didn't really follow a recipe for this. I looked up how to cook tilapia, but it seemed pretty foolproof, so I just decided to give it a try. I put about a tablespoon of butter in a skillet and then put in the filet of tilapia, cut down the middle, and then poured about a half cup or so of salsa on top. Then I just let it cook a few minutes on each side until it was white and flaky. Once I served it onto our plates, I spooned some more of the fresh salsa on top. We both really liked it!

As far as nutritional information goes, our tilapia filet was about 0.4 lb which is about 6 ounces. According to this nutrition website, an ounce of raw tilapia is 27 calories, 0 g fat, and 6 g protein. So my serving size of about 3 ounces plus some butter and homemade salsa is:

Nutritional info (3 ounces fish cooked in salsa and butter) [estimated]
150 calories
7 g total fat
15 mg cholesterol
5 g carbs
16 g protein

cuisinart hand blender

So I got a fun new cuisinart tool at costco before moving to Austin, and I've been trying to use it. It's a hand blender that has immersion blender, whisk, and chopper attachments. It's really handy and it's great for a small kitchen. I sort of made a mess the first time I tried to use the whisk attachment, but I figured out how to make it work. The chopper is fairly small and doesn't do too well with being completely full, but compared to not having those tools at all, it is great. And I know I will use the immersion blender a lot once it finally cools down here, in a few months.

And wow did I need to get myself off the cuisinart site before I went crazy making a wishlist.


new knives

Dana got me some new knives for my birthday! They are really snazzy and colorful in addition to being good knives. I'm pretty excited to get to use them.

They are komachi knives. I have the green paring knife, red tomato knife, blue utility knife, and magenta chef's knife. Below are two pictures I took, but it's worth googling to look at the images and reviews.