Sunday, January 23, 2011

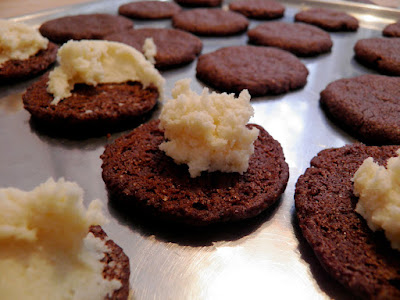
homemade oreos


Well, right now it is a snowy Sunday, but yesterday morning was when it started snowing, and I had pretty much the perfect Saturday. The Ministry of Education announced that all schools would be closed to students, but staff would still have to report and work full time for the week. In addition to just being irritating anyway, next week was scheduled to be finals, so now we have time off, little to grade, anticipation of a pain for finals rescheduling, and fears of future vacation days being cut.

So Saturday morning, to use the term loosely for 11:00 am, I squinted through my blinds at the trees. Since we got back from winter break, campus has been warm enough that all the snow has melted. But when I peeked through my window blinds, I saw white on the branches. I pulled the blinds open on the window nearest to me (and I still cannot express how much I love having two windows in my room that look out on trees; I missed trees and windows so much in Morocco) and saw that the forest behind our house was transformed into a winter wonderland again. I still feel the childlike glee at the thought of snow, even though I usually have no intention of actively engaging with it. I just love to look at it, to walk through it a bit, and to be inside, warm, while it graces the landscape around me.

I went downstairs to find my roommates collected under blankets in the living room. I settled into our lazy boy chair, and might I add that I certainly respect them for their comfort although I still have qualms about their appearance. We decided to invite people over for board games, and then the fun began. Kate came over and ordered me into the kitchen to make her cookies. At first, I wasn't too enthusiastic, but I found a recipe for homemade oreos and ended up really enjoying trying out a new recipe. Meanwhile, my roommates and the teachers that came over played a few rounds of Settlers. Settlers of Catan is a board game that one of my roommates got for Christmas. It is so much fun, and we have played it 85% of the nights since we got back from Christmas break. So I made oreos, and then I played a round of settlers. Then we switched gears to Dixit, a game that another teacher got that is really neat. It is a French game and each card is a unique picture done by an artist. On your turn, you pick a card and make up a story or title for it, and place it face down on the table. Then everyone else chooses a card/image from their hand that they think matches it. Then they are shuffled and laid out, and everyone selects which they think was the original one, and points ensue. It is pretty fun and interesting, and the cards are pretty beautiful and have a lovely surrealist strangeness that I love.

Of course, I found the recipe on SK. The cookies were good, and all were gone within a few hours of being baked, but I wasn't so wildly crazy about them that I would necessarily make them again. But for a group of people as a nice treat, it was fun to make and yummy. I mean, it has chocolate and frosting, so where can you go wrong. And the ones that I was able to put together and serve/eat while the cookies were still warm were quite delicious.


For the chocolate wafers:
1 1/4 cups all-purpose flour
1/2 cup unsweetened Dutch process cocoa
1 teaspoon baking soda
1/4 teaspoon baking powder
1/4 teaspoon salt
1 to 1 1/2 cups sugar [SK suggested 1 cup and that is what I did, so the cookie isn't too sweet]
1/2 cup plus 2 tablespoons (1 1/4 sticks) room-temperature, unsalted butter
1 large egg

For the filling:
1/4 cup (1/2 stick) room-temperature, unsalted butter
1/4 cup vegetable shortening [of course I don't have shortening here, so I just used more butter]
2 cups sifted confectioners’ sugar
2 teaspoons vanilla extract

Preheat to 375°F.

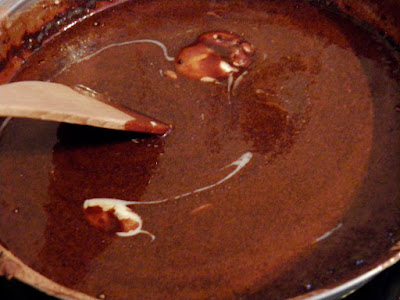
I used my handheld mixer to mix the flour, cocoa, baking soda and powder, salt, and sugar. While pulsing, or on low speed, add the butter, and then the egg. Continue processing or mixing until dough comes together in a mass. SK didn't mention that this would take a while or that the mix would not look like it even had the potential of coming together for a while, but I persisted and eventually it did. So when you see the picture of dusty batter above and then the moist clump, know that it was just time, and your batter will also eventually arrive to that state as well.

Take rounded teaspoons of batter and place on a parchment paper-lined baking sheet approximately two inches apart. With moistened hands, slightly flatten the dough. Bake for 9 minutes, rotating once for even baking [SK's instructions. I tried and it just demolished my little cookie, so I gave up on flipping]. I alternate two parchments with cookies, so that one is cooling on a rack and then getting replaced with new cookies while the other bakes.

To make the cream, place butter and shortening in a mixing bowl, and at low speed, gradually beat in the sugar and vanilla. Turn the mixer on high and beat for 2 to 3 minutes until filling is light and fluffy [this also took a while and didn't look like the butter sugar pellets would become icing, but they did].

To assemble the cookies, in a pastry bag with a 1/2 inch, round tip, pipe teaspoon-size blobs of cream into the center of one cookie [I didn't have  a pastry bag, so I just wiped some icing onto a cookie]. Place another cookie, equal in size to the first, on top of the cream. Lightly press, to work the filling evenly to the outsides of the cookie. Continue this process until all the cookies have been sandwiched with cream.

Thursday, January 20, 2011

no-bake cookies

An exciting revelation! No cook cookies, almost. I didn't even know that this existed. I can't remember exactly how I stumbled upon it. We were having a Christmas party (yes, I am backlogged but trying to catch up!) with my 8th graders, and I decided to bring cookies. It was the night before, a school night, and I wanted to use chocolate and oatmeal in the recipe. I think I just googled that or something, and this was the recipe I eventually decided upon. They were really simple, really sweet, and my students really liked them.


2 cups sugar
1/2 cup cocoa
1 stick butter
1/2 cup milk
1 tsp. vanilla
3 cups quick-cooking oatmeal
1/2 cup peanut butter

Combine sugar, cocoa, butter and milk in a saucepan. On medium heat, bring to a boil for one full minute, stirring. Remove from heat. Stir in peanut butter (optional), vanilla, and oatmeal.

Drop by spoonful onto wax paper. Let cool for at least 30 minutes. I put mine into the fridge overnight. They are a very different consistency than regular cookies and taste very sweet.

pasta with vodka sauce

One of my favorite pasta sauces is vodka sauce. Actually, every time I have Italian food at my dad's house, they make a really spicy arrabiata sauce, which I can't eat because I am a fairly big wimp when it comes to hot and spicy. So my dad always gets a jar of vodka sauce to make for me, and I am totally happy with that. Now, I like cooking my own food from scratch whenever possible and usually can't find most things pre-made here, so I decided for my Monday night dinner last week, I would make a vodka sauce. Of course, I went to SK first and she had one from Rachel Ray. I was surprised at how much vodka is in the recipe, and while I was cooking, my roommate came in and told me she had tried the same recipe last year and it came out really vodka tasting. That made me even more nervous, but in the end it turned out very delicious and just as it was supposed to taste.


1 tablespoon extra-virgin olive oil, once around the pan in a slow stream
1 tablespoon butter
2 cloves garlic, minced
2 shallots, minced
1 cup vodka
1 cup chicken stock
1 can crushed tomatoes (32 ounces)
Coarse salt and pepper
16 ounces pasta, such as penne rigate
1/2 cup heavy cream
20 leaves fresh basil, shredded or torn

Heat a large skillet over moderate heat. Add oil, butter, garlic, and shallots. Gently saute shallots for 3 to 5 minutes to develop their sweetness. Add vodka to the pan, 3 turns around the pan in a steady stream will equal about 1 cup. Reduce vodka by half, SK says this will take 2 or 3 minutes, I found that I waited longer. Add chicken stock, tomatoes. Bring sauce to a bubble and reduce heat to simmer. Season with salt and pepper.

While sauce simmers, cook pasta in salted boiling water until cooked.

Stir cream into sauce. When sauce returns to a bubble, remove it from heat. Drain pasta. Toss hot pasta with sauce and basil leaves. Impress your roommates and enjoy your delicious dinner!

Courtney's black bean and pumpkin soup

One of my few sources for recipes other than SK is one of my best friends, Courtney. Here is the almost frighteningly simple recipe that she sent me a while ago for a pumpkin and black bean soup. I keep a recipes document on my computer where I try to keep a list of recipes that I make or copy down recipes that people give me. The other day, I opened up the file to look at something, and I saw Courtney's soup recipe. I recently learned from a roommate that we can actually buy black beans at HIT from the organic section, so when I saw a recipe that used it, looked interesting, and would be a nice winter dinner, I decided to give it a try. To be completely honest, I was a little suspicious to try it out. Pumpkin and black bean don't really go together in my mind, and I wasn't sure if my little changes using real pumpkin instead of canned would make a difference. But I decided to give it a try and let my roommates be guinea pigs yet again, and it turned out really well. In addition to liking it for dinner, I went on to happily enjoy it for three days for lunch.

I decided to break the recipe down into a few more steps, especially because I used fresh pumpkin instead of canned, so I had to go through one or two more steps. All in all, it is still really simple.

Also, I got a new garlic press for Christmas (along with a few other really cute kitchen things - aprons and dishtowls from Ebe, cute bowls from Anthropologie from my "aunt," and cute measuring spoons also from Ebe, I think). The garlic press is a long silver tool, and you press it from side to side across the garlic, and it comes up through the slots. Then you just scrape it out. It is a lot easier to clean than the standard one, so I like it. I have it pictured below with some chopped (soft, yuck) purple onions.


Courtney’s Pumpkin Black Bean Soup

2 cans black beans
1 can diced tomatoes
2 cloves garlic
1/2 an onion
1 tbsp cumin
1 tsp cinnamon
1 tsp all spice
1 can pumpkin
4 cups chicken broth
salt, pepper

My first step was to rub the pumpkin chunks in olive oil and put them in the oven for a while to get them started getting soft. I should have done this earlier to give them like 20 minutes or however long it took to get them really roasted and soft, but I didn't and managed to work it out later.

First sauté onion, garlic, and spices. I didn't add spices right away because my computer was charging, so I was cooking from memory at first. Once I got my onion and garlic sauteed in some olive oil, I put in the spices and mixed it around. It was a fairly dry and clumpy mix, and it made me sort of nervous that it would burn, so I put my pumpkin in, as mentioned, before they were completely cooked. I decided to add two cups of water and two bouillon cubes (we don't have chicken broth, but it's the same either way) and bring that to a boil until the pumpkin was soft.

Once the pumpkin was soft, I turned the heat off briefly and added the other two cups of water and a bouillon cube. I got our immersion blender out and pureed the pumpkin until it was smooth.

If you are using canned pumpkin, you can just saute the onion, garlic, and spices, then add the pumpkin into that, and now we are all on the same page.

Once my pumpkin was blended in, I added the tomatoes and black beans. Courtney said to let it simmer for about 45 minutes, but since I had the pumpkin cooking in the broth and spices for a while before adding the black beans and tomatoes, I only cooked it for another 20 minutes or so. As I said before, we really liked it, and I kept eating it for the next few days for lunch.

Also, here are some pictures of my salad. No, it isn't just because I'm proud that I made a salad (though I am because I never make them and Lindsay always does and hers are so good), but because I put it in our big Bulgarian pottery bowl, and I love the way the painted Bulgarian pottery looks. I should have taken pictures of it all together before Christmas, but I bought my family several pieces of Bulgarian pottery, and it's all really pretty.


Tuesday, January 11, 2011

kitchen destination: dad's house

So, for the first time since starting cooking, I made a "meal" at my dad's. It wasn't cohesive or timely, but I did get to cook with my little sister for the first time ever (really, together), and we made some pretty tasty stuff. I was so lucky to get to go home for the holidays again this year, and even more so to get to go on a cruise with my family to the Caribbean. This isn't my gloating blog (you have to be a member, and trust me, they don't read it), so I'll stick to the kitchen. It was fun to actually wield my moderate skills in the kitchen for my family, try some new recipes, get to use fancy appliances and a large granite counter, and spend some quality time with my little sister. As far as the food goes, the cheesecake was delicious in spite of some run-ins with the oven; the spanakopita was a big hit; and the gnocchi had good flavor but is a difficult food to get the right texture and cook time.

But of course, I used Smitten Kitchen for the three recipes we tried: gnocchi, spanakopita, and cheesecake. I'll link to the gnocchi and show some pictures, but as my sister is actually the one who cooked it (I helped roll and cut), and we didn't feel that it was really worth passing on in spite of the flavors, I won't post more about it. I've tried cooking gnocchi twice, but since I don't die for it unless its fabulous in a restaurant anyway, I'm fairly disenchanted with trying to cook it again.

On the note of the gnocchi, a few words. It did taste good, so the recipe may well be fine - we all know I worship SK as a source. It ended up being quite sticky, and even though we cooked them in boiling water until they floated, they didn't really seem cooked correctly. They were too soggy, so my sister popped them in the oven for a bit to try to dry them out. They are just a mystery to me. We paired it with my host mom's simple Italian tomato sauce [at the end of that post], and together it worked, flavorwise.


The spanakopita, now there was a hit. My dad's girlfriend, like my sister, only eats fish. She also loves spinach and we're all fans of cheese. I was pretty surprised at how insanely simple it was to make this. I guess if I had to figure out phyllo dough, I would be in real trouble, but otherwise the recipe was very manageable. I recommend it! My dad's girlfriend finished the leftovers off for breakfast and lunch, and she and my sister thought the filling would even work well mixed with a pasta.


1 tablespoon unsalted butter
1/2 cup sliced green onions
1 clove garlic, minced
1 pound fresh spinach (coarse stems removed if ‘grown-up’ spinach; baby spinach can be used in full)
3/4 pound feta, crumbled
1 tablespoon lemon juice
Salt and pepper to taste

Melt one tablespoon butter in a large heavy skillet over moderate heat, add onions and garlic and saute for a minute, then cook spinach, stirring, until wilted and tender, an additional 4 to 8 minutes. SK says less for baby spinach, more for grown-up spinach. It took me a really long time, and I had to add it in gradually because a pound of spinach is actually a lot of volume. I put a few handfuls in, covered it with a lid, stirred things a bit, and repeated for a long time. I think it took me closer to 15 minutes or more than 4 - 8. Essentially, do it until it all gets mushy together.

Remove from heat and cool for about 10 minutes. Press mixture in mesh colander to remove as much liquid as possible. I put it in a colander, pressed it, put it on the cutting board, squished it with the knife and realized there was a lot of liquid left, squished it a lot, repeated the colander, and then got around to chopping it coarsely. Transfer to a bowl and stir in feta and lemon juice. Season with salt and pepper to taste. Let filling cool and follow instructions for phyllo triangles.


10 (17- by 12-inch) phyllo sheets, thawed if frozen - buy more than 10, my pack was of 20 and they were messy
1 stick (1/2 cup) butter

Preheat oven to 375°F. Melt butter in a small saucepan, then cool. Cover phyllo stack with 2 overlapping sheets of plastic wrap and then a dampened kitchen towel. I had a lot of difficulty with getting my phyllo sheets apart. We bought a frozen roll of 20 and let it sit out on the table for a few hours until we were ready to cook. When I started unrolling them and trying to peel them apart, they were ripping all over the place. Luckily, I guess you can just use middles and fudge sizes a bit, so it worked out, but I'm just admitting to having my fair share of frustrations with this.

Take one phyllo sheet from stack and arrange on a work surface with a long side nearest you (keeping remaining sheets covered) and brush with some butter. Top with another phyllo sheet and brush with more butter. Cut buttered phyllo stack crosswise into 6 (roughly 12- by 2 3/4-inch) strips.

Put a heaping teaspoon of filling near one corner of a strip on end nearest you, then fold corner of phyllo over to enclose filling and form a triangle. Continue folding strip (like a flag), maintaining triangle shape. Put triangle, seam side down, on a large baking sheet and brush top with butter. Make more triangles in same manner, using all of phyllo.

Bake triangles in middle of oven until golden brown, 20 to 25 minutes, then transfer to a rack to cool slightly.


I guess I was so effusive about the spanakopita because my dad's girlfriend is a fairly picky eater, or at least has really high standards, and she really liked it a lot. I did too. But I definitely also have a sweet tooth, and the cheesecake was delicious every step of the way. And I would know.


Crumb crust: - based on SK's recommendation, we did 1.6 of this recipe
8 ounces (15 4 3/4 x 2 1/2-inch sheets of graham cracker; yes, I am crazy enough to both count and measure) finely ground graham crackers or cookies such as chocolate or vanilla wafers
8 tablespoons (1 stick or 4 ounces or 113 grams) unsalted butter, melted
1/2 cup sugar
1/4 teaspoon salt

Very tall cheesecake filling:
5 (8-ounce) packages cream cheese, softened
1 3/4 cups sugar
3 tablespoons all-purpose flour
1 teaspoon finely grated lemon zest
1 teaspoon finely grated orange zest
5 large eggs
2 large egg yolks
1/2 teaspoon vanilla

SK has a topping, but we did not get around to making that. My dad's girlfriend had a jar of some cherries in a sauce and we mixed that with the mixed berries intended for the sauce, and everyone was content. I really enjoyed my cheesecake mostly plain, though, because the flavor was great.

Make crumb crust:
Stir together crust ingredients and press onto bottom and up the sides, stopping one inch shy of the top rim**, of a buttered 9 1/2-inch (or 24 cm) springform pan. (SK: You can fill it right away but I like to pop my into the freezer so it quickly sets while I prepare the filling)

Make very tall cheesecake filling:
Preheat oven to 550 degrees* (yes, really that much. Also, really not on the highest rack because then the top will turn brown and make you sad. Also, probably put your cheesecake springform pan on another pan so it doesn't leak something and make your oven smoke so much that it fills the kitchen when you open it to discover your browned top. But 550 is correct. Don't believe me? Check SK's comments. I'm not the only one with oven troubles).

Beat together cream cheese, sugar, flour and zest with an electric mixer until smooth. Add vanilla, then eggs and yolks, one at a time, beating on low speed until each ingredient is incorporated. Scrape bowl down between additions - it's worth it.

Put springform pan with crust in a shallow baking pan (to catch drips - SK said it, I didn't see it). Pour filling into crust (springform pan will be completely full) and baking in baking pan in the middle of the oven for 12 minutes or until puffed. Please watch your cake because some ovens will top-brown very quickly and if yours does too fast, turn the oven down as soon as you catch it. Reduce the temperature to 200 degrees and continue baking until cake is mostly firm (center will still be slightly wobbly when pan is gently shaken), about one hour more.

Run a knife around the top edge of the cake to loosen it and cool the cake completely in springform on a rack, then chill it, loosely covered, at least 6 hours.

Then, wow all your family and friends with your delicious cake, and then take some to the rest of your family because there are leftovers, which only happen with a cake this dense and filling. Everyone loved it, including me, and I almost want to make it again here because it was just so darn good. I wonder if I can get my hands on graham crackers, but that will be the determining factor. And time/motivation.


All pictures were on my dad's camera, and I uploaded all of these before the cheesecake came out of its cooling overnight. He has a picture to email me of the finished (brown) version, so I'll add that when it arrives.